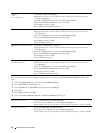
Windows 7/
7 x64/
Server 2008 R2 x64
1
Click
Start
→
Devices and Printers
.
2
Right-click the printer icon of the Dell C3760n/C3760dn Color Laser Printer, and then
select
Printer properties
.
3
Click the
Configuration
tab, and then select
Bi-Directional Setup
.
4
Select
Get Information from Printer
and then click
OK
.
5
Click
Apply
, and then click
OK
.
6
Close the
Devices and Printers
dialog box.
Windows Vista/Vista x64 1
Click
Start
→
Control Panel
→
Hardware and Sound
→
Printers
.
2
Right-click the printer icon of the Dell C3760n/C3760dn Color Laser Printer, and then
select
Properties
.
3
Click the
Configuration
tab, and then select
Bi-Directional Setup
.
4
Select
Get Information from Printer
and then click
OK
.
5
Click
Apply
, and then click
OK
.
6
Close the
Printers
dialog box.
Windows Server 2008/Server 2008 1
Click
Start
→
Control Panel
→
Printers
.
x64
2
Right-click the printer icon of the Dell C3760n/C3760dn Color Laser Printer, and then
select
Properties
.
3
Click the
Configuration
tab, and then select
Bi-Directional Setup
.
4
Select
Get Information from Printer
and then click
OK
.
5
Click
Apply
, and then click
OK
.
6
Close the
Printers
dialog box.
Windows XP/XP x64/Server 1
Click
Start
→
Printers and Faxes
.
2003/Server 2003 x64
2
Right-click the printer icon of the Dell C3760n/C3760dn Color Laser Printer, and then
select
Properties
.
3
Click the
Configuration
tab, and then select
Bi-Directional Setup
.
4
Select
Get Information from Printer
and then click
OK
.
5
Click
Apply
, and then click
OK
.
6
Close the
Printers and Faxes
dialog box.
If the printer information is not updated automatically after clicking Get Information from Printer, follow these
steps:
1
Click the
Configuration
tab, and then select
Installable Options
.
2
Select
Hard Disk
in the
Items
list box.
3
Select
Available
in the
Hard Disk
drop-down menu in
Setting for
.
4
Click
OK
.
5
Click
Apply
, and then click
OK
.
6
Close the
Printers and Faxes
(
Printers
, or
Devices and Printers
) dialog box.
Mac OS X 10.7.x/10.8.x 1
Select the
Print & Scan
in
System Preferences
.
2
Select the printer in
Printers
list, and click
Options & Supplies
.
3
Select
Driver
, select the options that have been installed on the printers, and then click
OK
.
Mac OS X 10.5.x/10.6.x 1
Select the
Print & Fax
in
System Preferences
.
2
Select the printer in
Printers
list, and click
Options & Supplies
.
3
Select
Driver
, select the options that have been installed on the printers, and then click
OK
.
Installing Optional Accessories 62


