10
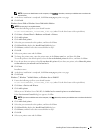
To change the printer name, enter the printer name in the
Printer name
box, and then click
Next
.
To use this printer as the default printer, select the
Set as the default printer
check box, and then click
Next
.
11
If you do not share your printer, select
Do not share this printer
. If you share your printer, select
Share this printer
so that others on your network can find and use it
.
12
Click
Next
.
Installation starts.
13
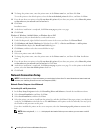
As the driver installation is completed, click
Print a test page
to print a test page.
14
Click
Finish
.
Windows 8, Windows 8 64-bit Edition, or Windows Server 2012
1
Extract the zip file you downloaded to your desired location.
2
Under Desktop mode, right-click the bottom left corner of the screen, and then click
Control Panel
.
3
Click
Hardware and Sound
(
Hardware
for Windows Server 2012)
→
Devices and Printers
→
Add a printer
.
4
Click
Have Disk
to display the
Install From Disk
dialog box.
5
Click
Browse
, and then select the extracted folder in step 1.
6
Click
OK
.
7
Select your printer name and click
Next
.
8
To change the printer name, enter the printer name in the
Printer name
box, and then click
Next
. Installation
starts.
9
If you do not share your printer, select
Do not share this printer
. If you share your printer, select
Share this printer
so that others on your network can find and use it
. Click
Next
.
10
As the driver installation is completed, click
Print a test page
to print a test page. To use this printer as the default
printer, select the
Set as the default printer
check box.
11
Click
Finish
.
Network Connection Setup
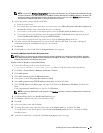
NOTE: To use this printer in a Linux environment, you need to install a Linux driver. For more information on how to install and
use these, see "Installing Printer Drivers on Linux Computers (CUPS)."
Network Printer Setup on a Local Network
For installing PCL and PS printer driver
1
In the
Easy Setup Navigator
window, click
Installing Driver and Software
to launch the installation software.
2
Select
Network Installation
, and then click
Next
.
3
Select
Local Installation
, and then click
Next
.
4
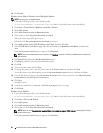
Select the printer you want to install from the printer list, and then click
Next
. If the target printer is not displayed
on the list, click
Refresh
to refresh the list or click
Add Printer
to add a printer to the list manually. You may specify
the IP address and port name at this point.
If you have installed this printer on the server computer, select the
I am setting up this printer on a server
check
box.
NOTE: When using AutoIP, 0.0.0.0 is displayed in the installer. Before you can continue, you must enter a valid IP
address.
Installing Printer Drivers on Windows
®
Computers 82


