


166 MFP disassembly/assembly ENWW
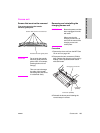
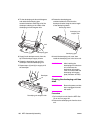
Removing and reinstalling the
TSL unit
CAUTION Be sure the power cord has
been unplugged from the
wall outlet.
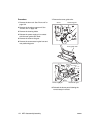
Procedure
1 Pull the ADU frame from the MFP. See
“Pulling out and reinstalling the ADU
stand” on page 188.
2 Remove the transfer/separation corona
unit.
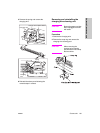
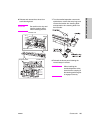
3 Remove the inline connector (CN463).
CAUTION A inline connector consists
of two male sides and one
female side. Be sure to
remove only the male side
(shown below) of the
CN463 connector.
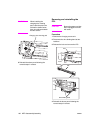
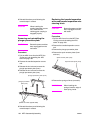
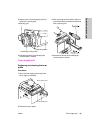
4 Remove the three screws and remove the
TSL unit.
5 Reinstall the above parts following the
removal steps in reverse.
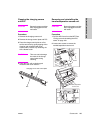
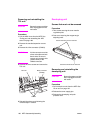
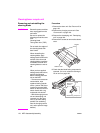
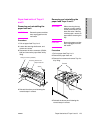
Developing unit
Screws that must not be removed
Procedure
1 Two screws securing the toner transfer
regulation plate.
2 One screw securing the magnet angle
adjusting knob.
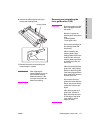
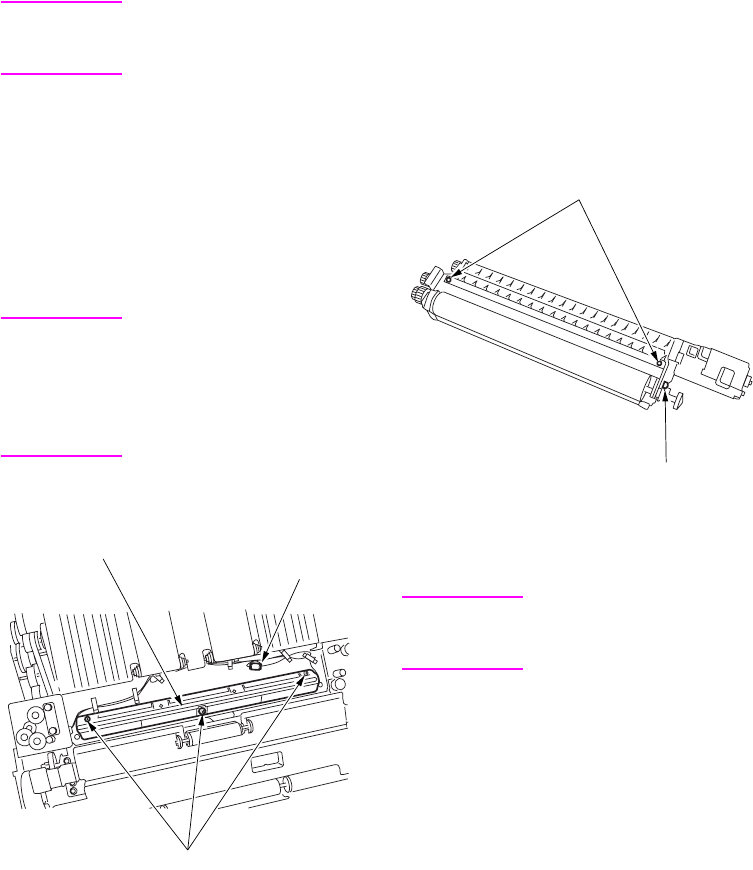
Removing and reinstalling the
developing unit
CAUTION Be sure the power cord has
been unplugged from the
wall outlet.
Procedure
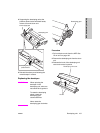
1 Pull out the drum unit from the MFP. See
“Drum unit” on page 152.
2 Release the toner supply pipe.
3 Release the developing unit push
pressure lever.
TSL unit
Relay connector
(CN463)
Screws
Screws that must not be removed
Screw that must not be removed