


74 Finisher disassembly/assembly ENWW
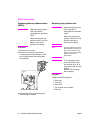
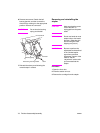
Stacker section
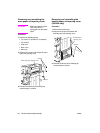
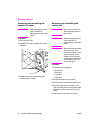
Removing and reinstalling the
stacker unit cover
CAUTION Make sure that the power
cord of the MFP is
unplugged from the power
outlet.
Procedure
1 Open the front door.
2 Remove five screws to detach the stacker
unit cover.
3 Reinstall the above parts following the
removal steps in reverse.
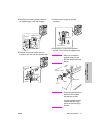
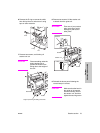
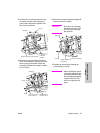
Removing and reinstalling the
stacker unit
WARNING! HP recommends that at
least two people perform
this service.
CAUTION Make sure that the power
cord of the MFP is
unplugged from the power
outlet.
WARNING! Be careful when detaching
the stacker unit. If you
remove the stopper, and in
succession pull out the
stacker unit, the finisher
may fall due to the weight
of the stacker unit. This
may cause injury.
Procedure
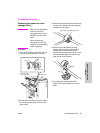
1 Remove the following parts:
• Booklet tray
•Side cover
• Front door
• Rear cover
2 Detach the finisher from the MFP.
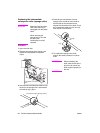
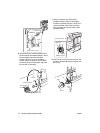
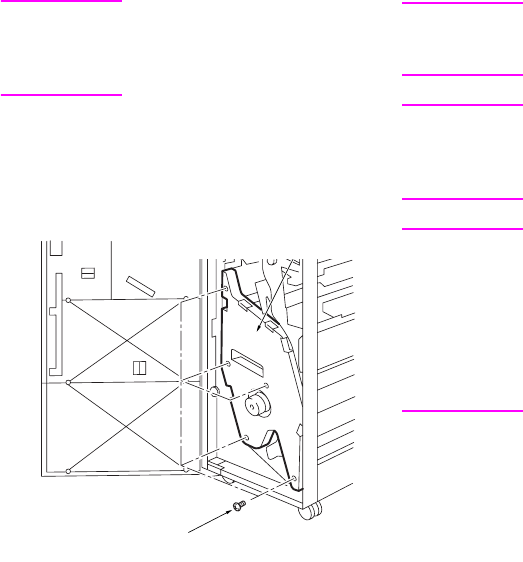
3 Pull the handle and draw the stacker unit.
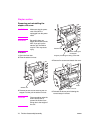
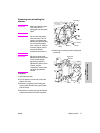
4 Disconnect the three connectors (CN1,
CN2, and CN3) from the relay board (RB).
(Q3633A has two connectors, CN1 and
CN2).
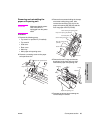
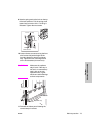
5 Remove each cable from wire guide.
Stacker unit
Screws