


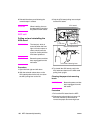


ENWW Vertical conveyance section 187
MFP disassembly/assembly
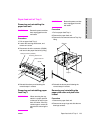
Vertical conveyance section
Removing and reinstalling the
vertical conveyance section
CAUTION Be sure the power cord has
been unplugged from the
wall outlet.
Procedure
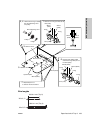
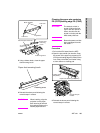
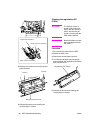
1 Remove all right side covers. See
“External section” on page 132.
2 Disconnect the connector (CN880).
3 Remove eleven screws to remove the
vertical conveyance section.
4 Reinstall the above parts following the
removal steps in reverse.
CAUTION When installing the vertical
conveyance section, be
sure to secure the screws
with the vertical
conveyance door closed.
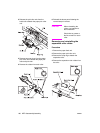
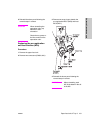
Removing and reinstalling the
vertical conveyance MC (MC11,
MC12)
CAUTION Be sure the power cord has
been unplugged from the
wall outlet.
Procedure
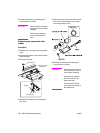
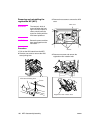
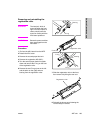
1 Remove the vertical conveyance section.
2 Remove the gear lock to remove the two
gears and two spacer axes.
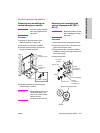
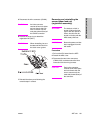
3 Disconnect the two connectors (CN881,
CN882) to remove the wiring harness from
the harness guide.
4 Remove each MC.
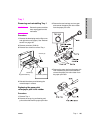
Screws (11)
Connector (CN880)
Vertical
conveyance door
Vertical
conveyance
section
Spacer axis
Spacer axis
Gear
Vertical
conveyance
MC/1(MC11)
Connector (CN882)
Vertical
conveyance
MC/2
(
MC12
)
Connector
(CN881)
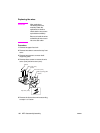
Vertical conveyance MC
Detent