


208 MFP disassembly/assembly ENWW
Fuser
Removing and reinstalling the
fuser
WARNING! Do not touch the fuser
immediately after turning
off the main power switch
because it is very hot and
you may suffer burns. Wait
until the fuser has cooled
down sufficiently before
working on it.
CAUTION Be sure the power cord has
been unplugged from the
wall outlet.
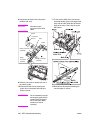
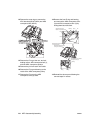
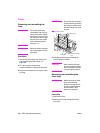
Procedure
1 Pull out the ADU stand. See “Pulling out
and reinstalling the ADU stand” on
page 188.
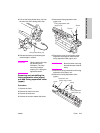
2 Turn the pressure release lever
counterclockwise to release the pressure.
3 Remove two screws and remove the fuser
by lifting.
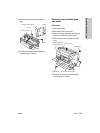
CAUTION Do not hold the connector
socket. Remove by holding
the pressure release lever
and the holding end at the
far side.
4 Reinstall the above parts following the
removal steps in reverse.
CAUTION After installing the fuser,
turn the pressure release
lever clockwise and return
it to the original position.
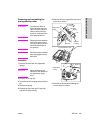
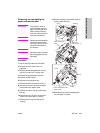
Removing and reinstalling the
fuser (top)
CAUTION Before opening the fuser
(top), check that the
pressure release lever is
turned counterclockwise
and the bottom roller
pressure is released.
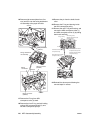
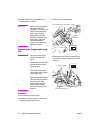
Procedure
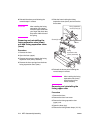
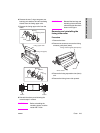
1 Remove the fuser.
2 Remove one screw to detach the fuser
front cover.
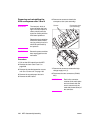
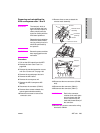
Connector socket
Screws (2)
Fixing unit
holding end
Pressure release
lever