


2 Troubleshooting Procedures 2.7 Optical Drive Troubleshooting
2-36 PORTEGE A200 Maintenance Manual (960-499)
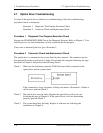
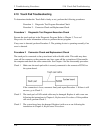
2.7 Optical Drive Troubleshooting
To check if the optical drive is defective or malfunctioning, follow the troubleshooting
procedures below as instructed.
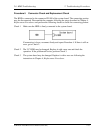
Procedure 1: Diagnostic Test Program Execution Check
Procedure 2: Connector Check and Replacement Check
Procedure 1 Diagnostic Test Program Execution Check
Execute the CD-ROM/DVD-ROM Test in the Diagnostic Program. Refer to Chapter 3, Tests
and Diagnostics for more information on how to perform the test program.
If any error is detected by the test, go to Procedure 2.
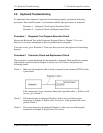
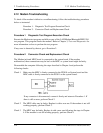
Procedure 2 Connector Check and Replacement Check
The optical drive is connected to the system board by the connector. The connector may be
disconnected from the system board or faulty. Disassemble the computer following the steps
described in Chapter 4 and perform the following checks:
Check 1 Make sure the following connector PJ1801 has been firmly connected to the
optical drive and the system board.
If the connection is loose, reconnect it firmly and return to Procedure 1. If there is
still an error, perform Check 2.
Check 2 The optical drive may be faulty. Replace the optical drive with a new one
following the steps in Chapter 4. If the optical drive is still not functioning
properly, perform Check 3.
Check 3 The system board may be faulty. Replace it with new one following the
instructions in Chapter 4.