Enabling data roaming
Connect to your mobile operator’s partner networks and access data services when
you’re out of your mobile operator’s coverage area.
Using data services while roaming will be costly. Check with your mobile operator
for data roaming rates before you use data roaming.
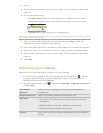
1. From the Home screen, press , and then tap Settings > Wireless & networks.
2. Tap Mobile networks, and then select the Data roaming check box.
Select the Data roaming sound check box if you’d like HTC Flyer to play a sound so
you’ll know when it’s connecting to a roaming network.
Wi-Fi
To use Wi-Fi, you need access to a wireless access point or “hotspot”. The availability
and strength of the Wi-Fi signal will vary depending on objects, such as buildings or
simply a wall between rooms, the Wi-Fi signal has to pass through.
Turning Wi-Fi on and connecting to a wireless network
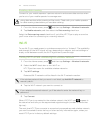
1. From the Home screen, press , and then tap Settings > Wireless & networks.
2. Select the Wi-Fi check box to turn Wi-Fi on.
HTC Flyer then scans for available wireless networks.
3. Tap Wi-Fi settings.
Detected Wi-Fi networks will be listed in the Wi-Fi networks section.
If the wireless network that you want is not listed, tap Add Wi-Fi network to
manually add it.
4. Tap the Wi-Fi network you want to connect to.
If you selected a secured network, you'll be asked to enter the network key or
password.
5. Tap Connect.
When HTC Flyer is connected to the wireless network, the Wi-Fi icon appears in
the status bar and tells you the approximate signal strength (number of bands that
light up).
The next time HTC Flyer connects to a previously accessed secured wireless network,
you won’t be asked to enter the key or other security information again, unless you
reset HTC Flyer to its factory default settings.
177 Internet connections


