204
Chapter 11: Memory and Option Cards
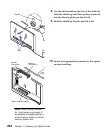
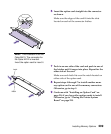
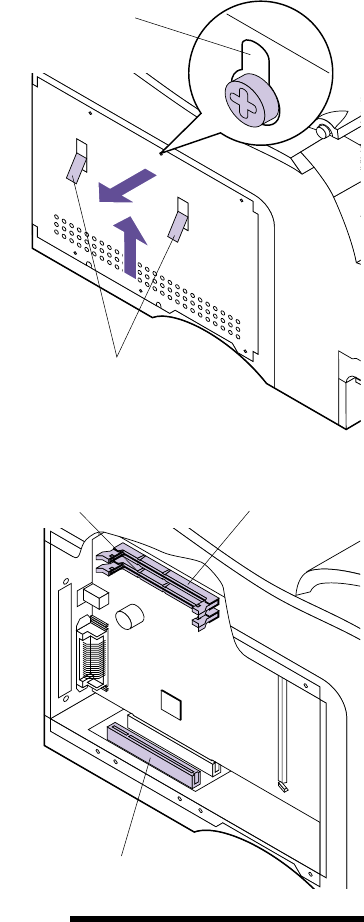
8 Use the tabs located on the side of the shield to
slide the shield up until the top three screws fit
into the three keyholes on the shield.
9 Hold the shield by the tabs and lift it off.
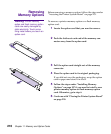
10 Locate the appropriate connector for the option
you are installing.
Note: Both memory connec-
tor 1 and memory connector 2
are capable of accepting either a
printer memory option or a flash
memory option card.
Tabs
Keyhole
M
emory
Connector 1
Memory
Connector 2
Option Card Connector


