


Polycom RMX 1000 User Guide
12-3
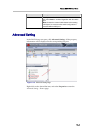
Customizing IVR Information
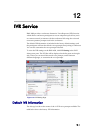
RMX 1000 supports customized IVR prompts. You can upload IVR
format-compatible audio files to the device and use personalized voice
prompts during conferences.
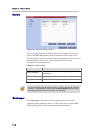
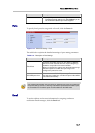
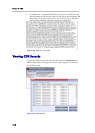
Replace the IVR information
To replace the existing IVR information:
1 From the IVR list, click the corresponding language option for the IVR
information you want to replace, set a target IVR language, and then
click the relevant Download button
.
2 The Upload File dialog box pops up. Enter the path to the audio file you
want in the file upload path box, or click the Open button to set the path,
and then click the Download button to upload the file.
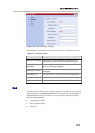
3 A pop-up box opens and prompts you to reboot. You need to reboot the
device for all newly uploaded audio files to take effect. Click the
Confirmation button to reboot your device.
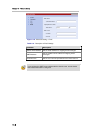
After the files are uploaded successfully and the device is rebooted, you can
click the corresponding Play button
to test play the prompt voice in
order to verify if the file modification is successful.
When uploading an IVR file, the file name is restricted to alphanumeric characters, the
file format is restricted to PCM only, and the sampling frequency must be16 or 32 KHz,
16bit, and mono.
Recording an Audio Message
You can record voice messages for different languages or customize them to
your needs for IVR service.
To record audio messages, use any sound recording utility available in your
computer or record them professionally in a recording studio. Make sure that
recorded message can be saved as a Wave file (*.wav format) and that the
recorded format settings are defined as 16 or 32 KHz, 16bit, and mono. The
files are converted into the RMX internal format during the upload process.
This section describes the use of the Sound Recorder utility delivered with
Windows 95/98/2000/XP.
Make sure that a microphone or a sound input device is connected to your
PC.
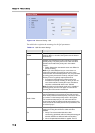
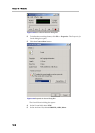
To define the format settings for audio messages:
The format settings for audio messages need to be set only once. The settings will
then be applied to any new audio messages recorded.
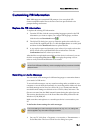
1 On your PC, click Start -> Programs -> Accessories -> Entertainment ->
Sound Recorder. The Sound–Sound Recorder dialog box opens.