Synology DiskStation User's Guide
Based on DSM 3.1
130 Chapter 11: Share Photos, Videos, and Blogs with Photo Station
Enable Photo Station
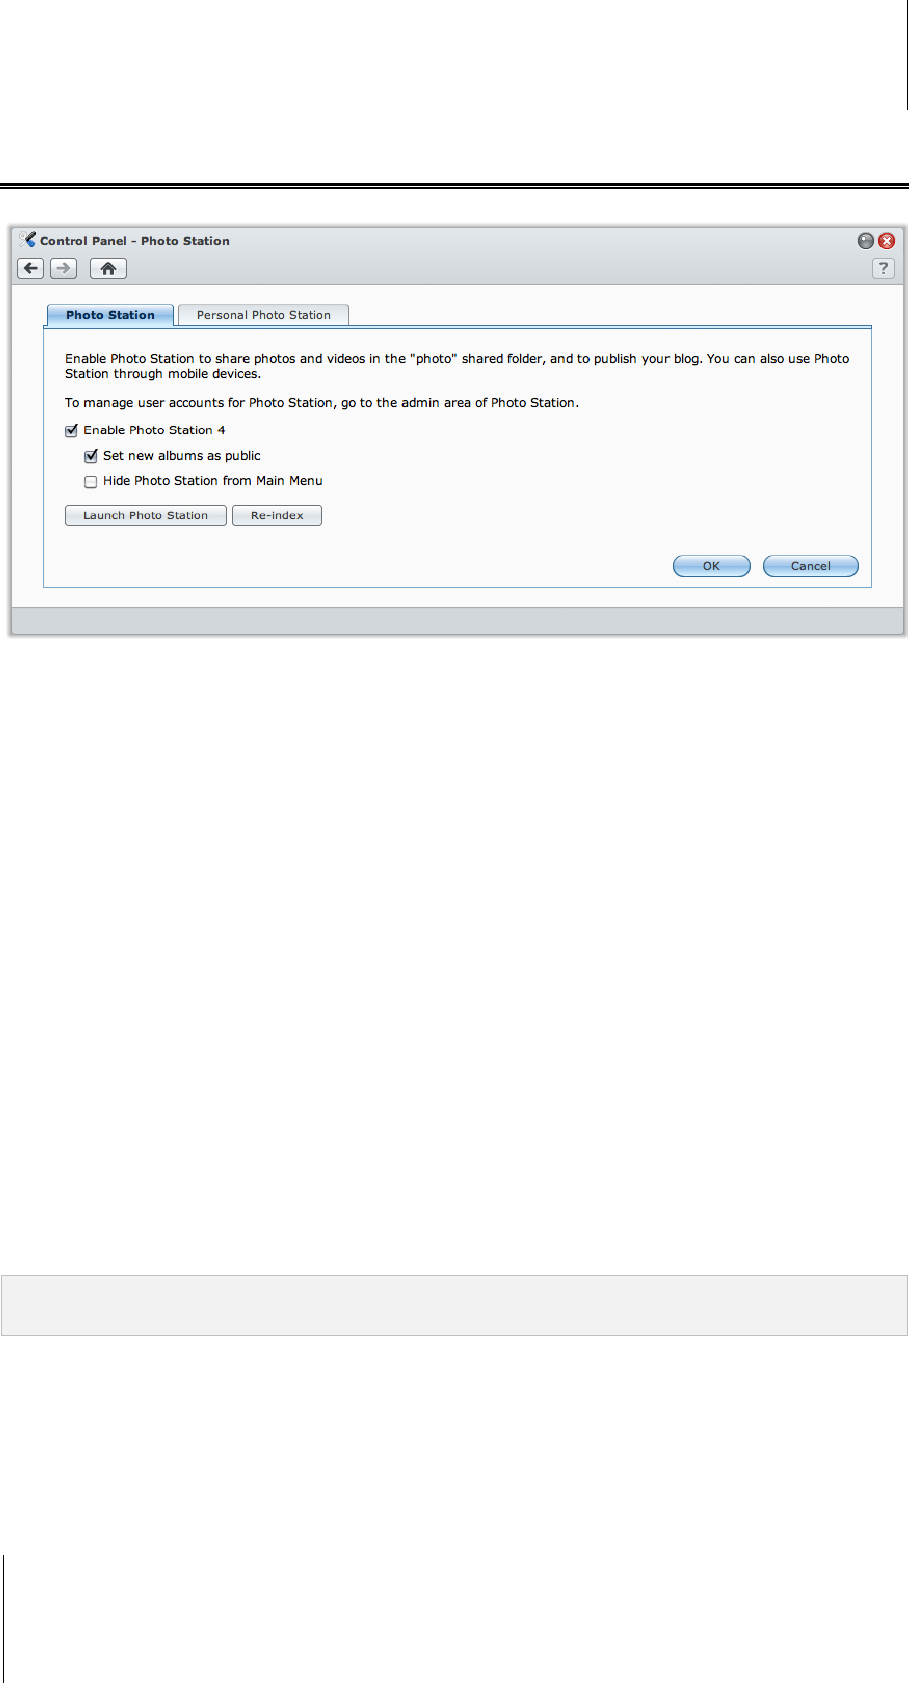
Go to Main Menu > Control Panel > Photo Station to enable Photo Station owned by DSM admin.
To enable Photo Station:
1 Click the Photo Station tab.
2 Tick Enable Photo Station 4.
3 Click OK.
After it is enabled, the photo shared folder will be created automatically to contain Photo Station data.
To edit Photo Station settings:
1 Click the Photo Station tab.
2 Tick Set new albums as public if you want the uploaded photo albums available to visitors.
3 Click Re-index to reconstruct the index structure of the image files If you found missing images in
Photo Station. The process will be executed in the background.
4 Click OK.
To launch Photo Station, do any of the following:
Click Launch Photo Station.
Go to Main Menu and click Photo Station.
Type the following web address in the address bar of your web browser:
http://Synology_Server_IP_Address/photo/
To connect via Mobile Device:
Photo Station can be accessed using the web browser of a mobile device with Android OS 1.5 onward, iPhone
OS 2.3.1 onward, or Windows Mobile 6.0 (Internet Explorer Mobile or Opera 9.0 or later).
If you have a mobile device using iPhone OS 3.0 onward or Android OS 1.5 onward, you can also download
DS photo+ on Apple App Store or Android Market to access Photo Station.
Note: For more information about using mobile devices to access Synology DiskStation services, see "Chapter 17:
Communicate with Mobile Devices" on Page 217.
Support and Limitations
Video formats viewable on Photo Station: 3G2, 3GP, ASF, AVI, DAT, DivX, FLV, M4V, MOV, MP4, MPEG,
MPG, QT, WMV, XviD
Video formats not viewable but downloadable on Photo Station: RM, RMVB, VOB, RV30, RV40, AC3,
AMR, WMA3
Maximum image file size: 20 MB (excluding images in RAW format)


