


13 - 22
13
e-STUDIO350/352/353/450/452/453
FUSER UNIT / PAPER EXIT SECTION
© 2003 - 2008 TOSHIBA TEC CORPORATION All rights reserved
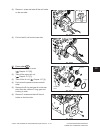
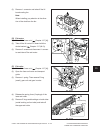
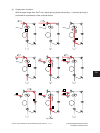
Fig. 13-725
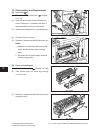
(7) Take out the fuser roller with the bushing
from the front side.
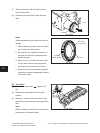
(8) Remove C-ring and bushing from the fuser
roller.
Fig. 13-726
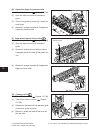
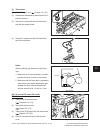
Notes:
When reassembling, pay attention to the fol-
lowings.
1. When inserting the fuser roller, be careful
not to deform the thermistors.
2. Be careful of the installation direction of
the gear (the direction of the protrusion
inside the gear).
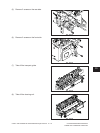
3. Make sure not to scratch the fuser roller.
Lay the fuser roller on the clean place
and prevent the fuser roller from dust.
4. When the fuser roller has been replaced,
makesuretocleantheseparationngers
for the fuser roller.
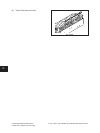
Fig. 13-727
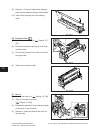
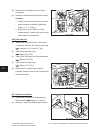
[K] Thermistor
(1) Take off the fuser roller ( Chapter 13.7
[J]).
(2) Release the harnesses from 4 harness
clamps.
(3) Remove 1 screw for each thermistor. Then
take off the main thermistor and edge therm-
istor.
Note:
When installing, be careful not to deform the
thermistors or the frame (plate).
C-ring
Bushing
Outer side
(C-ring side)
Inner side
(Bushing side) Protrusion