


Windows Scanning
Xerox® WorkCentre® 3215/3225
User Guide
129
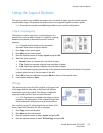
Load Documents
Documents can be loaded either into the automatic document feeder or onto the platen glass.
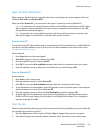
Automatic Document Feeder
The automatic document feeder can hold a maximum of 40 originals of 20 lb (80 g/m²) thickness.
1. Load documents to be scanned face up in the input tray of the automatic document feeder with
the top of the document to the left of the tray.
2. Move the document guide to just touch both sides of the document.
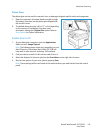
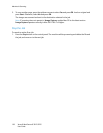
Platen Glass
The platen glass can be used for oversized, torn, or damaged originals and for books and magazines.
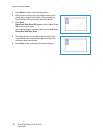
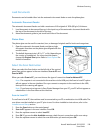
1. Open the automatic document feeder and place single
documents face down on the platen glass aligned with the
rear left corner.
2. The default document size is 8.5 x 11” or A4 (depending on
the country of installation). For other sized documents,
change the Original Size option. Refer to Scan Options for
further information.
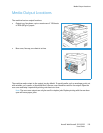
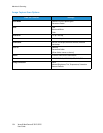
Select the Scan Destination
When you select the Scan button on the left side of the control
panel, two options appear in the user interface: Scan to PC and
Scan to WSD.
When you select Scan to PC, you must choose the type of connection: Local or Network PC.
Note: If a computer is not connected to the machine via the USB port, the Scan to Local PC option
will not appear in the user interface. Once you connect a computer to the machine via the USB,
that option for scanning will appear.
Note: If you have not set up scan in Easy Printer Manager from your PC, your PC will not appear as
a destination in the Scan Menu at the machine.
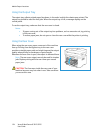
Scan to Local PC
To use Scan to Local PC, the machine must be connected to your PC or workstation via a USB cable. The
scan driver must be installed on your PC prior to use. For driver installation instructions, refer to the
Installation and Setup section.
1. Press the Scan button on the control panel.
2. Scan to PC appears in the user interface. Press OK.
3. Press the up/down arrows to select Local PC.
4. Press OK. If you see the Not Available message, check the port connection and/or scan setup.
5. Press the up/down arrows to select the scan destination you want and press OK.