


Using Address Book From the Control Panel
Xerox® WorkCentre® 3215/3225
User Guide
173
Using Address Book From the Control Panel
From the Address Book button on the control panel you can:
• Search for addresses
• Add, delete, or edit addresses for Individuals, Fax Groups, or E-mail Groups
• Establish Speed Dial and Group Dial numbers for addresses
• Enter and use Smart Key addresses
• Print the Address Book.
To use the Address Book in a fax or e-mail job from the machine’s control panel, you
must be in the appropriate function mode for the job. Select the fax or e-mail button before accessing
the Address Book to find the addresses you need to perform the job.
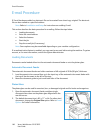
Searching the Address Book
There are two ways to search for an address in the Address Book memory. You can either preview the
entries sequentially or search by entering the first letters of the name associated with the address.
1. Press Fax or E-mail on the control panel depending on the type of job you want to do.
2. For E-mail, the From Address:_________ prompt appears. Press OK. The Enter To Address: ______
field appears.
For Fax, the To: ________ prompt appears in the user interface.
3. Press the Address Book button on the control panel.
4. Press the up/down arrows to select either Local or LDAP/Global. Press OK.
5. Enter a few letters of the name you are searching for. The machine will return matching names.
6. Press the up/down arrows until the name and address you want displays and press OK.
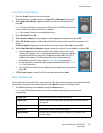
Speed Dial Numbers
You can store up to 200 frequently-used fax or email addresses as speed dial numbers.
Registering a Speed Dial Number
1. Press Fax or E-mail on the control panel.
2. Press Address Book on the control panel.
3. Press the up/down arrows to select New & Edit and press OK.
4. Press the up/down arrows to select Speed Dial and press OK.
5. Enter a speed dial number between 1 and 200 and press OK.
If an entry is already stored in the number you choose, a message is displayed. To start over with
another speed dial number, press Back. Enter another, unassigned speed dial number.
6. Enter the name you want assigned to that speed dial number and press OK.
For details on how to enter alphanumeric characters, refer to Using the Keypad in Getting Started.