


E-mail Procedure
Xerox
®
WorkCentre
®
3215/3225
User Guide
167
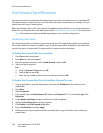
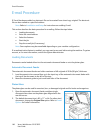
Enter the E-mail Address
1. Press the E-mail button on the control panel.
If Authentication is enabled, enter your Login ID and Password (if required).
2. When Enter From Address: appears, enter the sender’s e-mail address and
press OK.
Note: The administrator can set up the e-mail function in CWIS so that the user
at the machine sees choices for the ‘from’ address.
Note: Use orange C button to erase keyboard entry.
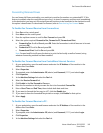
3. Enter To address. Press OK.
4. When Another address? prompt appears, choose appropriate response and press OK.
5. When File Format appears, scroll to select the file format you wish to send the document in via
e-mail.
If Send to Myself? appears, press the left/right arrows to select Yes or No and press OK.
6. When Enter Destination Addresses: appears, enter the recipient’s e-mail address and press OK.
•Use the .com button to add commonly used address text to the e-mail
address, for example .com or @yourdomainname.com. Press the .com key
repeatedly until the text required is displayed and press OK. The text is
added to the address. The Smart Key text can be customized using
CentreWare Internet Services, refer to Address Book for instructions.
• E-mail addresses can also be added using the Address Book. (See Address
Book for instructions.)
• Press the down arrow and enter additional e-mail addresses if required and
press OK.
7. If File Format appears, select the file format required and press start.
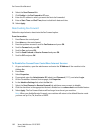
Select the Features
Various features can be selected for your e-mail job. The most common features are selected from the
control panel. Once you have made a selection, press Back to return to the Ready screen.
1. The following features are available through the Menu button:
Note: Some of the following options may be unavailable depending on your machine
configuration.
Original Size Use to set the size of the image being scanned.
Original Type Used to improve the image quality by selecting the document type for
the originals.
Resolution Sets the image resolution. A higher resolution increases the file size.
Output Color Sets the color mode of the scanned image.
Lighten/Darken Provides manual control to adjust the lightness or darkness of the
scanned images.