


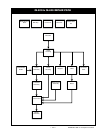


• 2-45 • RMAN-QLS-002 rev. A Repair Procedures
You must use an ESD strap and work at a properly grounded workstation (antistatic mat or tray).
All electronic components must be placed on an ESD protective tray. If stored, any elec-
tronic components must be placed in antistatic bags.
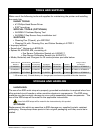
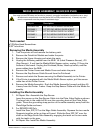
Model Kit p/n Comments
QL 320
AN16861-023 units built prior to 1/22/03
AN16861-024 units built after 1/22/03
QL 320 Plus RK18465-001
QL 420 RK18231-1
QL 420 Plus RK17735-001
Tools Needed
#1 Phillips head screwdriver
3
/
32
” Hex Driver
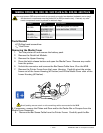
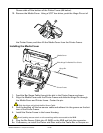
Removing the Media Cover
1. Turn the printer off and remove the battery pack.
2. Remove the QuickLink Module.
3. Remove the Upper Housing.
4. Press the latch release button and open the Media Cover. Remove any media
from the printer.
5. Unlock the connector and remove the Bar Sense Cable from J2 on the MLB.
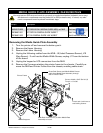
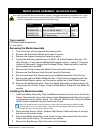
7. Remove the Printer Frame from the Lower Housing. Carefully pivot the printer
frame out of the Lower Housing (#2 below) and lift the Media Cover clear of the
Lower Housing (#3 below) .
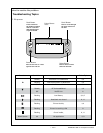
media coveR, QL 320, QL 320 pLuS & QL 420,QL 420 pLuS
Avoid putting excess strain on the remaining cables connected to the MLB.
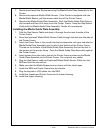
8. If necessary, remove the Platen and Gear and/or the Peeler Bar or Scraper from the
Media Cover Assembly.
9. Remove the Bar Sense Cable from the Printer Frame. Carefully peel the Bar
3
2