


• 2-75 • RMAN-QLS-002 rev. A Repair Procedures
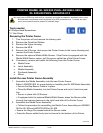
Introduction
You will need to replace the Keypad if it has been physically damaged or no longer
functions properly. This procedure covers installation of both the standard membrane
Keypad and the optional LCD Keypad. Remember that changing the type of keypad
from what was originally installed on your printer will also change the printer’s congu-
ration.
Tools needed
#1 Phillips Head Screwdriver.
3/32” hex driver
Preparation
1. Turn the printer off and remove the battery pack.
2. Remove the QuickLink Module.
3. Remove the Upper Housing.
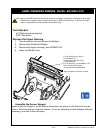
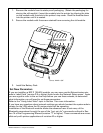
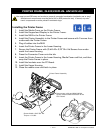
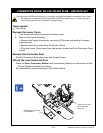
Removing the Keypad
1. Unlock J6 on the MLB, and unplug the ex circuit.
2. Unlock J8 on the MLB, and unplug the ex circuit (LCD Keypads only)
3. Remove the screw and nylon Washer securing the Keypad ground strap to the
MLB. Retain this hardware.
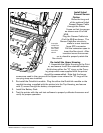
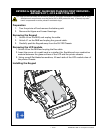
4. If you are replacing a Membrane Keypad:
a. Unlock J6 on the MLB, and unplug the ex circuit.
b. Remove the screw and Washer securing the Keypad ground strap to the MLB.
c. Slide the Keypad Assembly out of the Lower Housing as shown.
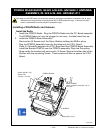
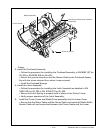
Installing an LCD Keypad
1. Plug the ex circuit from the Keypad into J6 and lock the connector.
2 Plug the Flex cable from the Display into J8 and lock the connector.
3. Fold the static ground strap from the Keypad so that exposed copper on the
end of the ground strap will make contact with the pad on the MLB. Secure the
Ground Strap to the MLB with a 4-40 x 1/4” Socket Head Screw and #4 Nylon
Washer.
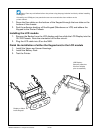
4. Slide the LCD Keypad into the Lower Housing, dressing the Keypad ex circuit
(which plugs into J6) and the ground strap down and under the MLB. Gently
fold loop of display Flex Circuit (which plugs into J8) over the top of Display. Al-
low to relax back into place.
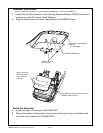
5. Slide the Keypad Assembly into the Lower Housing as shown, dressing the ex
circuits down and under the MLB.
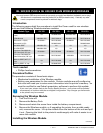
membRane & Lcd Keypad, QL320/320pLuS/320coSt Reduced
& QL420/420pLuS/420coSt Reduced
an16861-021, RK18235-1 & RK17735-032
You must use an ESD strap and work at a properly grounded workstation (antistatic mat or tray).
All electronic components must be placed on an ESD protective tray. If stored, any elec-
tronic components must be placed in antistatic bags.