


RMAN-QLS-002 rev. A Repair Procedures • 2-96 •
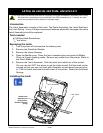
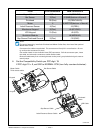
You must use an ESD strap and work at a properly grounded workstation (antistatic mat or tray).
All electronic components must be placed on an ESD protective tray. If stored, any elec-
tronic components must be placed in antistatic bags.
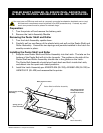
Introduction
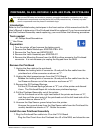
The Latch Assembly consists of the Latch. The Peeler Assembly, the Latch Shaft and
the Latch Spring. If any of these components become physically damaged, the entire
Latch Assembly should be replaced.
Tools needed
#1 Phillips Head Screwdriver.
3
/
32
” hex driver
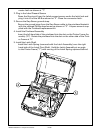
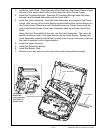
Removing the Latch
1. Turn the printer off and remove the battery pack.
2. Remove the QuickLink Module.
3. Remove the Upper Housing.
4. Open the Media cover. Press the latch release button and open the Media
Cover as though loading media. Remove any media from the printer. (Refer to
the User’s Manual)
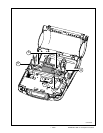
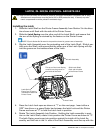
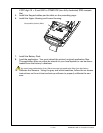
5. Remove the Latch Assembly. Push the latch pivot shaft out of the printer.
You can use the 3/32” hex driver to get the shaft started. Pull the shaft out far
enough so that you can rock the Latch Assembly up and away from the print-
er. Pull the Latch shaft and the latch clear of the printer. Retain the Printhead
Springs.
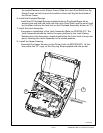
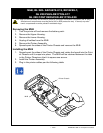
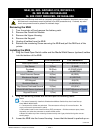
Installing the Latch
Latch, QL 420/ QL 420 pLuS- an16753-011
Latch Shaft
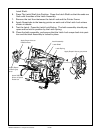
Rotate Latch
Assembly out
of the printer.
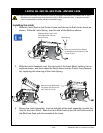
Remove the Latch
Spring
Latch Assembly