


• 2-81 • RMAN-QLS-002 rev. A Repair Procedures
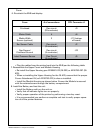
Tools needed
3
/
32
” Hex Driver
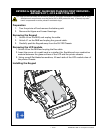
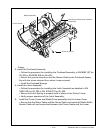
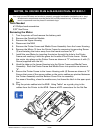
Remove the Lower Cover
1. Turn the printer off and remove the battery pack.
2. Remove the Lower Housing
• Remove the Upper Housing by removing (3) Screws and pulling the upper
housing clear.
• Remove the two screws from the Printer Frame.
• Pivot the Lower Cover away from the printer chassis until the Connector Door
is free.
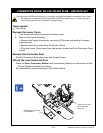
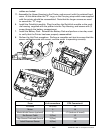
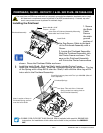
Remove the Connector Door
Pull the Connector Door away from the Printer Frame.
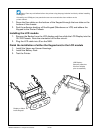
Attach the new Connector Door
Press the Door, Connector, Rubber over the retaining feature on the bottom of the
Printer Chassis Assembly as shown.
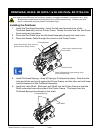
Re-assemble the Lower Housing to the Printer Frame.
You must use an ESD strap and work at a properly grounded workstation (antistatic mat or tray).
All electronic components must be placed on an ESD protective tray. If stored, any elec-
tronic components must be placed in antistatic bags.
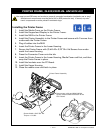
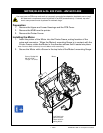
connectoR dooR, QL 220 /QL220 pLuS - an16972-021
QL220 Door, Connector,
p/n CA16548-1
Printer shown with
Lower Housing
removed