


• 2-97 • RMAN-QLS-002 rev. A Repair Procedures
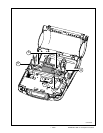
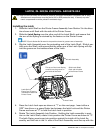
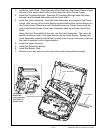
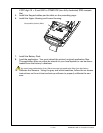
1. Install the Latch Shaft. Slide the Latch Pivot Shaft into the Printer Frame so that
the end of the shaft is ush with the left hand side of the Printer Frame.
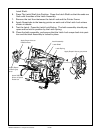
2. Install the Printhead Springs. Snap the (2) Printhead Springs back into place
between the Printhead Assembly and the Latch shaft .
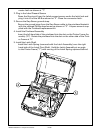
3. Install the Latch Assembly. Hold the Latch Assembly at an angle to the Printer
Frame with one leg of the Latch Spring captured behind the vertical feature on
the Printer Frame. Rotate the Latch Assembly over the Printer Frame until the
hole in the left hand side of the Latch Assembly lines up with the Latch Pivot
Shaft.
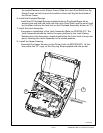
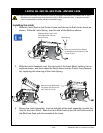
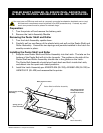
Press the Latch Pivot shaft all the way into the Latch Assembly. The Latch As-
sembly should be held in the open position by the Latch Spring. Rotating the
Latch Assembly closed should allow the latch Lock to snap into place, retaining
the Latch Assembly in the closed position.
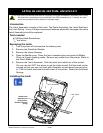
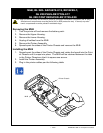
4. Install the Upper Housing.
5. Install the QuickLink module.
6. Install the Battery Pack.
7. Perform a two key reset to verify the printer was reassembled correctly.
Latch Assembly
Latch Shaft
Latch Spring
Ensure that
spring leg hooks
over feature in
Printer Frame.