


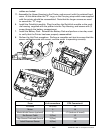

• 2-83 • RMAN-QLS-002 rev. A Repair Procedures
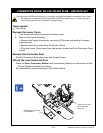
You must use an ESD strap and work at a properly grounded workstation (antistatic mat or tray).
All electronic components must be placed on an ESD protective tray. If stored, any elec-
tronic components must be placed in antistatic bags.
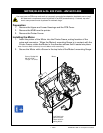
motoR,QL220 & QL 220 pLuS - an16972-002
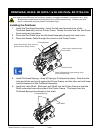
Preparation
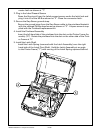
1. Remove the Upper and Lower Housings and the PCB Cover.
2. Remove the MLB from the printer.
3. Remove the Printer Frame.
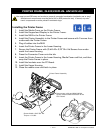
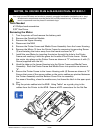
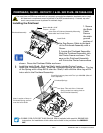
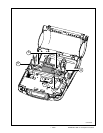
Installing the Motor
1. Insert the pinion of the Motor into the Printer Frame, noting location of the
wires and connector. When the Motor’s mounting ange is in contact with the
Printer Frame, rotate the Motor in the direction shown until it seats into place.
Note: Push the Rack Lock away from the Motor while assembling.
2. Secure the Motor with a Screw in the top hole of the Motor’s mounting ange.
Push Rack Lock
against Printer
Frame while in-
stalling Motor
Motor
Screw, Socket Hd.
#4-40 x 3/16”
Torque = 5 in/lbs.