


RMAN-QLS-002 rev. A Repair Procedures • 2-74 •
Note: Clean any old adhesive from the printer using Isopropyl alcohol and let dry before installing
the Keypad.
If installing an LCD Keypad, use particular care not to scratch the clear window on the
printer chassis.
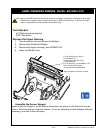
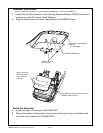
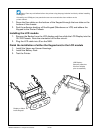
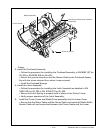
1. Dress the ex cables on the bottom of the Keypad through the two slots on the
bottom of the chassis.
2. Peel the adhesive backing off the Keypad (Membrane or LCD) and adhere the
Keypad to the Printer Chassis.
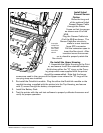
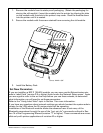
Installing the LCD module
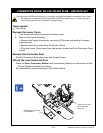
1. Remove the Backer from the LCD display and then slide the LCD Display into the
QL 220 Chassis. Note the orientation of the ex circuit.
2. Plug the LCD cable into J8 on the MLB.
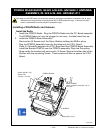
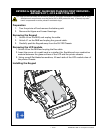
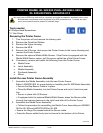
Finish the installation of either the Keypad and/or the LCD module
1. Install the Upper and Lower Housings.
2. Install the Battery Pack.
3. Test the Printer.
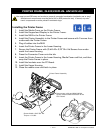
Display or Mem-
brane Keypad
LCD Display:
Remove protective
lm from display
prior to assembly