


Installation and Getting Started Guide
53 209.159.39.0 255.255.255.0 207.95.6.101 1/1 1 S
54 209.159.40.0 255.255.255.0 207.95.6.101 1/1 1 S
55 209.159.41.0 255.255.255.0 207.95.6.101 1/1 1 S
56 209.159.42.0 255.255.255.0 207.95.6.101 1/1 1 S
57 209.159.43.0 255.255.255.0 207.95.6.101 1/1 1 S
58 209.159.44.0 255.255.255.0 207.95.6.101 1/1 1 S
59 209.159.45.0 255.255.255.0 207.95.6.101 1/1 1 S
60 209.159.46.0 255.255.255.0 207.95.6.101 1/1 1 S
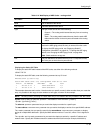
This example shows all the routes for networks beginning with 209.159. The mask value and longer parameter
specify the range of network addresses to be displayed. In this example, all routes within the range 209.159.0.0 –
209.159.255.255 are listed.
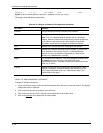
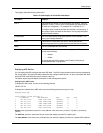
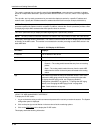
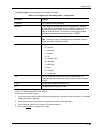
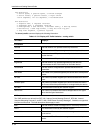
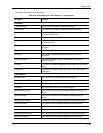
The following table lists the information displayed by the show ip route command.
Table 6.16: CLI Display of IP Route Table
This Field... Displays...
Destination The destination network of the route.
NetMask The network mask of the destination address.
Gateway The next-hop router.
Port The port through which this router sends packets to reach the route's
destination.
Cost The route's cost.
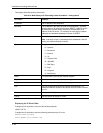
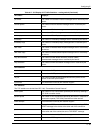
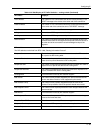
Type The route type, which can be one of the following:
• B – The route was learned from BGP.
• D – The destination is directly connected to this routing switch.
• R – The route was learned from RIP.
• S – The route is a static route.
• * – The route is a candidate default route.
• O – The route is an OSPF route. nless you use the ospf option
to display the route table, “O” is used for all OSPF routes. f you
do use the ospf option, the following type codes are used:
• O – OSPF intra area route (within the same area).
• IA – The route is an OSPF inter area route (a route that
passes from one area into another).
• E1 – The route is an OSPF external type 1 route.
• E2 – The route is an OSPF external type 2 route.
U
I
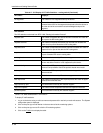
USING THE WEB MANAGEMENT INTERFACE
To display the IP route table:
1. Log on to the device using a valid user name and password for read-only or read-write access. The System
configuration panel is displayed.
2. Click on the plus sign next to Monitor in the tree view to list the monitoring options.
3. Click on the plus sign next to IP to list the IP monitoring options.
4. Click on the Routing Table
link to display the table.
6 - 92