


Installation and Getting Started Guide
NOTE: Once you configure an interface with a network number and frame type, you can define filters and assign
them to the interface.
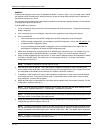
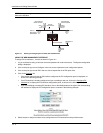
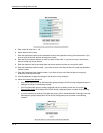
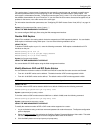
Figure 14.1 Defining and assigning IPX Forward, RIP and SAP filters
USING THE WEB MANAGEMENT INTERFACE
To assign IPX to interfaces 1, 2 and 3 as shown in Figure 14.1:
1. Log on to the device using a valid user name and password for read-write access. The System configuration
dialog is displayed.
2. Click on the plus sign next to Configure in the tree view to expand the list of configuration options.
3. Click on the plus sign next to IPX in the tree view to expand the list of IPX option links.
4. Click on the Interface
link.
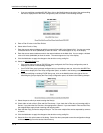
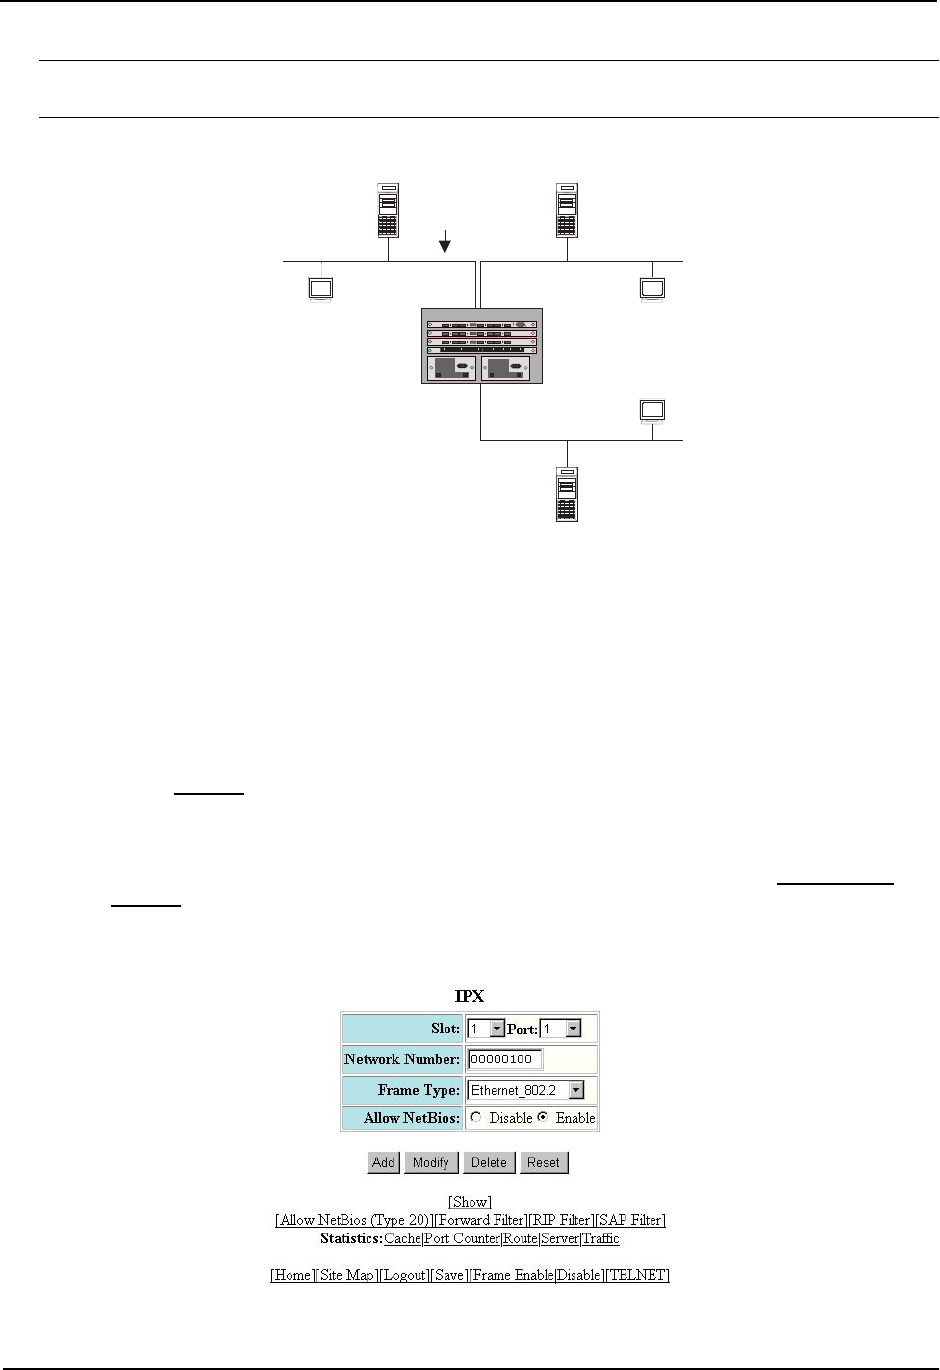
• If the device does not have an IPX interface configured, the IPX configuration panel is displayed, as
shown in the following example.
• If an IPX interface is already configured and you are adding a new one, click on the Configure IPX
Interface link to display the IPX interface configuration panel, as shown in the following example.
• If you are modifying an existing IPX interface, click on the Modify button to the right of the row describing
the interface to display the IPX configuration panel, as shown in the following example.
5. Select the port or slot/port numbers to be configured as an IPX interface from the pull down menu.
14 - 4
Internal Network
Number: 01010101
Node: 1
HR
Server
Internal Network
Number: 03030303
Node: 1
Finance
Server
SAP, RIP
Advertisements
Client #1
MAC address:
008012345678
Network 100 802.2 Network 300 802.2
e1 e3
e2
Client #3
Network 200 802.2
Client #2
Public
Server