


Advanced Configuration and Management Guide
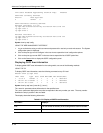
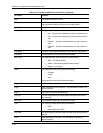
Displaying OSPF ABR and ASBR Information
To display OSPF ABR and ASBR information for the routing switch, use one of the following methods.
USING THE CLI
To display OSPF ABR and ASBR information, enter the following command at any CLI level:
HP9300> show ip ospf border-routers
Syntax: show ip ospf border-routers [<ip-addr>]
The <ip-addr> parameter displays the ABR and ASBR entries for the specified IP address.
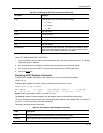
USING THE WEB MANAGEMENT INTERFACE
1. Log on to the device using a valid user name and password for read-only or read-write access. The System
configuration panel is displayed.
2. Click on the plus sign next to Monitor in the tree view to expand the list of monitoring options.
3. Click on the plus sign next to OSPF in the tree view to expand the list of OSPF option links.
4. Click on the ABR ASBR Routers
link.
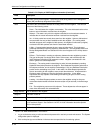
Displaying OSPF Trap Status
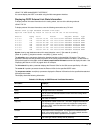
To display the state (enabled or disabled) of the OSPF traps, use one of the following methods.
All traps are enabled by default when you enable OSPF. To disable or re-enable an OSPF trap, see “Modify
OSPF Traps Generated” on page 8-35.
USING THE CLI
To display the state of each OSPF trap, enter the following command at any CLI level:
HP9300> show ip ospf trap
Interface State Change Trap:
Virtual Interface State Change Trap:
Neighbor State Change Trap:
Virtual Neighbor State Change Trap:
Interface Configuration Error Trap:
Virtual Interface Configuration Error Trap:
Interface Authentication Failure Trap:
Virtual Interface Authentication Failure Trap:
Interface Receive Bad Packet Trap:
Virtual Interface Receive Bad Packet Trap:
Interface Retransmit Packet Trap:
Virtual Interface Retransmit Packet Trap:
Originate LSA Trap:
Originate MaxAge LSA Trap:
Link State Database Overflow Trap:
Link State Database Approaching Overflow Trap:
Syntax: show ip ospf trap
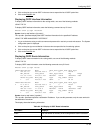
USING THE WEB MANAGEMENT INTERFACE
Enabled
Enabled
Enabled
Enabled
Enabled
Enabled
Enabled
Enabled
Enabled
Enabled
Enabled
Enabled
Enabled
Enabled
Enabled
Enabled
1. Log on to the device using a valid user name and password for read-only or read-write access. The System
configuration panel is displayed.
2. Click on the plus sign next to Configure in the tree view to expand the list of configuration options.
3. Click on the plus sign next to OSPF in the tree view to expand the list of OSPF option links.
4. Click on the Trap
link to display the OSPF Trap panel.
8 - 48