10: Connections
SLB™ Branch Office Manager User Guide 130
to
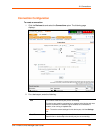
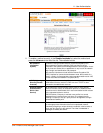
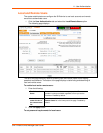
From the drop-down list, select a destination for the connection: a device
port connected to a serial device, a device port connected to a modem,
or an outbound network connection (Telnet, SSH, TCP Port, or UDP
Port).
Note: To see the current settings for a selected device port, click the
Settings link.
Hostname
The host name or IP Address of the destination. This entry is required if
the to field is set to Telnet out, SSH out, TCP port, or UDP port.
Port If the to field is set to Device Port or Modem on Device Port, enter the
number of the device port. For all other options, this is the TCP/UDP port
number, which is optional for Telnet out and SSH out, but required for
TCP Port and UDP Port.
Notes:
If you select Device Port, it must not have command line interface logins
enabled or be running a loopback test.
To view the device port's settings, click the Settings link to the right of
the port number.
SSH Out Options
Select one of the following optional flags to use for the SSH connection.
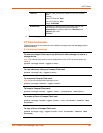
User: Login ID to use for authenticating on the remote host.
Version: Version of SSH. Select 1 or 2.
Command: Enter a specific command on the remote host (for example,
reboot).
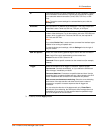
Trigger
Select the condition that will trigger a connection. Options include:
Connect now: Connects immediately, or if you reboot the SLB branch
office manager, immediately on reboot.
Connect at date/time: Connects at a specified date and time. Use the
drop-down lists to complete the date and time. Upon rebooting, the SLB
device reestablishes the connection if the date/time has passed.
Auto-connect on characters transferring: Select the arrow indicating
the direction of the data transfer and either the minimum number of
characters or a specific character sequence that will trigger the
connection.
You can select the direction of the data transfer only if Data Flow is
bidirectional. Upon rebooting, the SLB branch office manager does not
reestablish the connection until the specified data has passed through
one of the endpoints of the connection.
3. To save, click the Apply button.


