


Related topics:
• “Using the All-In-One Center” on page 138
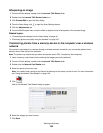
Enhancing photo print quality using the software
1 From the Finder desktop, double-click the Lexmark 7500 Series folder.
2 Double-click the Lexmark 7500 Series Center icon.
3 From the “What is being scanned?” menu, choose Photo.
4 From the “How will the scanned image be used?” pop-up menu, choose To be printed or To be viewed on
monitor/web page. Photo scanning is optimized based on this selection.
5 Click Preview/Edit to open the Scan dialog.
6 From the Scan dialog, click to open the Scan Settings drawer.
7 From the Settings tab, make sure you select one of the preset scan settings appropriate for your photo.
You can also customize scan settings by adjusting color depth, resolution, and choosing a descreening option.
8 Select the Adjustments tab and fine-tune the scan settings.
Related topics:
• “Using the All-In-One Center” on page 138
• “Customizing scan settings from the Scan dialog” on page 48
Enlarging or reducing an image
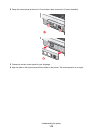
1 Load paper.
2 Load an original document facedown on the scanner glass.
3 From the control panel, press or repeatedly until Copy is highlighted.
4 Press or to select the number of copies.
The number of copies is automatically set to 1.
5 Press .
6 Press repeatedly until Resize is highlighted.
7 Press or to choose among the following options: 50 percent, 100 percent, 200 percent, Custom, Fit to
Page, 2x2 Poster, 3x3 Poster, 4x4 Poster, or Borderless.
8 Press to preview the output.
9 Press to adjust the settings.
10 Repeat step 8 to step 9 as needed.
11 Press to save your settings temporarily.
12 Press .
Related topics:
• “Loading original documents on the scanner glass” on page 34
• “Using the control panel” on page 113
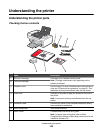
Working with photos
105