Using the Printing Options
4-52
Printing a Document
4
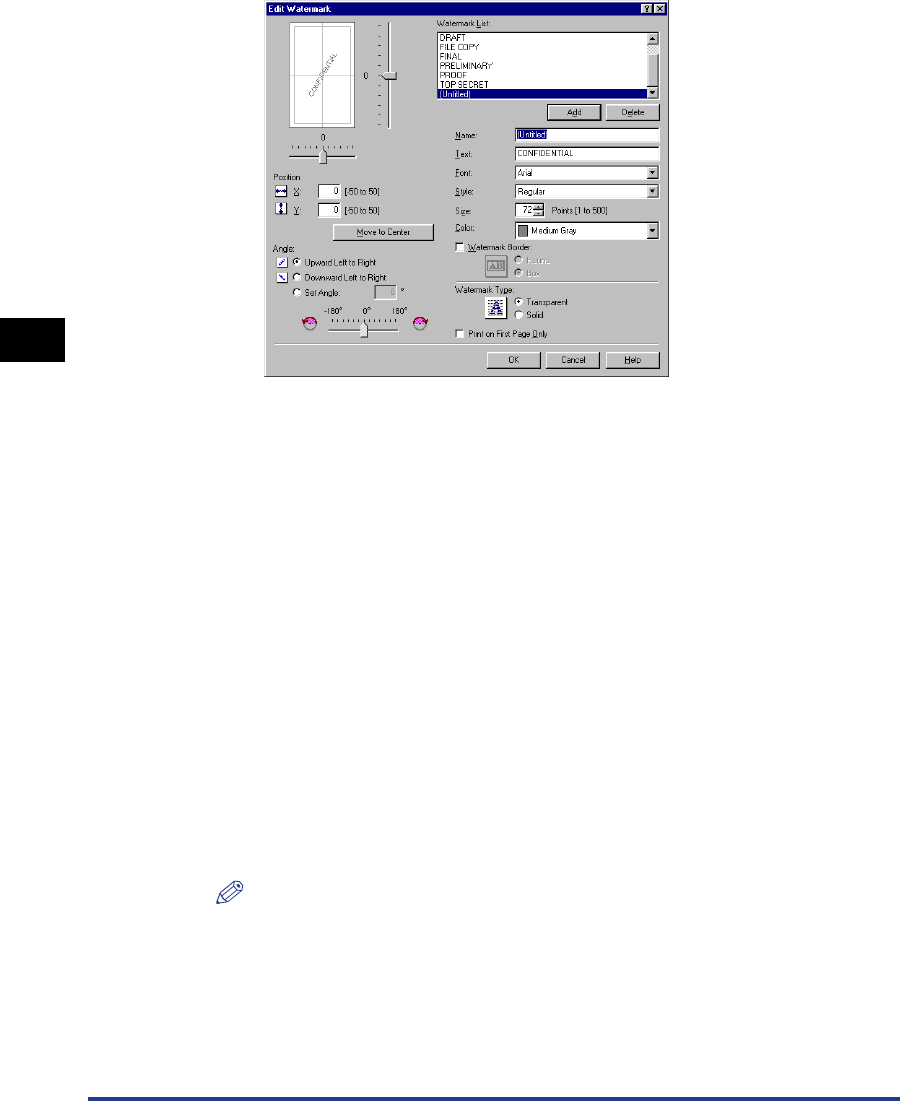
The [Edit Watermark] dialog box will appear.
2
Specify the following options as needed.
NOTE
•
When adding a new watermark, click [Add].
•
The default watermarks cannot be changed.
3
Confirm the settings, then click [OK].
The display will return to the [Page Setup] sheet.
[Position]: Specify the print position from -50 to 50 which represents
positions on the X and Y axes.
[Angle]: Specify the angle of the watermark.
[Name]: Enter the name of the new watermark to be displayed in
[Watermark] in the [Page Setup] sheet.
[Text]: Enter the characters to be printed as a watermark.
[Font]: Select the font type for the watermark (TrueType fonts only).
[Style]: Select the font style for the watermark.
[Size]: Specify the font size for the watermark.
[Color]: Specify the color for the watermark.
[Watermark Border]: Specify whether a border encloses the watermark when
printed.
[Watermark Type]: Select the watermark type from either [Transparent] or [Solid].
[Print on First Page Only]: Check this option to print the watermark only on the first page
of the document.
