Access the menu for Ink Tank replacement
1
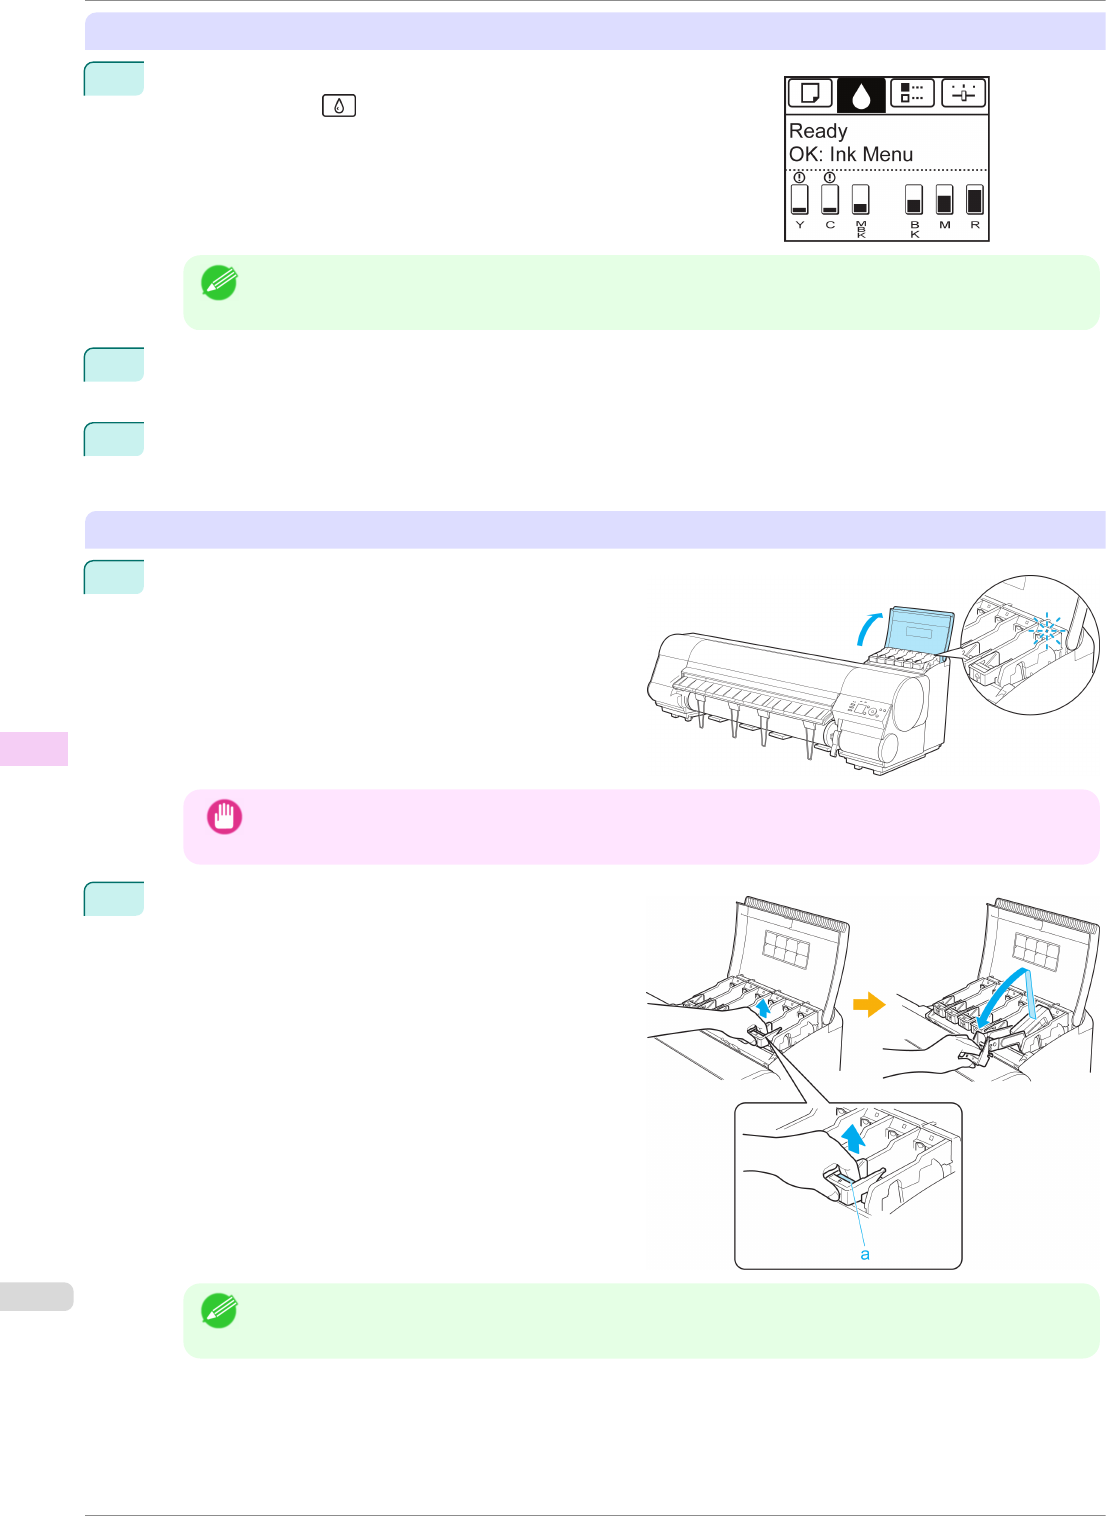
On the Tab Selection screen of the Control Panel, press ◀ or ▶ to
select the Ink tab ( ).
Note
• If the Tab Selection screen is not displayed, press the Menu button.
2
Press the OK button.
The Ink Menu is displayed.
3
Press ▲ or ▼ to select Rep. Ink Tank, and then press the OK button.
Instructions are displayed on the Display Screen.
Remove the Ink Tank (330 ml)
1
Open the Ink Tank Cover of the tank for replacement
and check the Ink Lamp.
The Ink Lamp flashes quickly if there is no ink left.
Important
• Avoid hitting the printer when replacing an Ink Tank. Handle the printer gently when replacing tanks.
Jolting the printer during printing may deteriorate print quality.
2
Lift the stopper (a) of the Ink Tank Lock Lever for the
color to replace. Lift the Ink Tank Lock Lever until it
stops, and then push it down to the front.
Note
• Push the Ink Tank Lock Lever down until it locks.
• Make sure the Ink Tank Lock Lever does not return to the original position.
Replacing Ink Tanks
iPF8400SE
User's Guide
Maintenance and Consumables Ink Tanks
536


