3
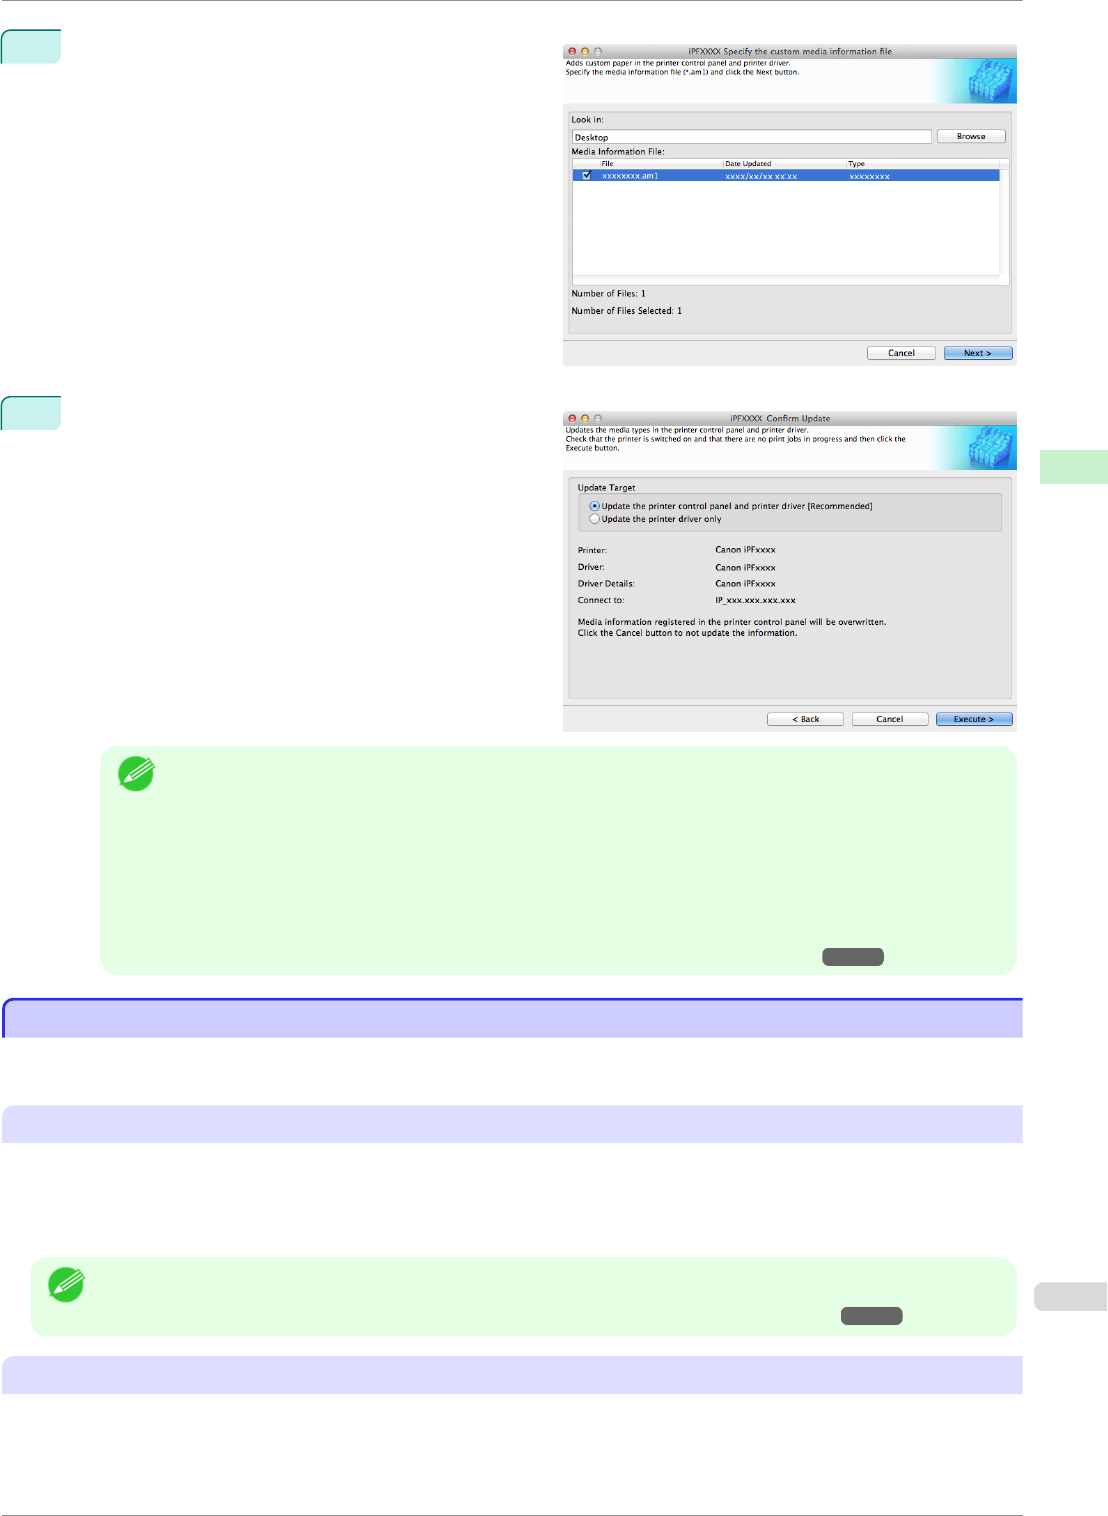
Select the Custom Media Information File (.am1 file)
to import.
4
The Confirm Update dialog box opens.
Click the Execute button.
Note
• You should normally select Update the printer control panel and printer driver.
The custom paper is added to the control panel of the printer and to the printer driver of the PC you are
using.
• When the custom paper is correctly added to the printer driver, the name of the added custom paper is
displayed in the Edit Media Types dialog box that is opened by Add Genuine Paper in the Media Con-
figuration Tool window.
• After importing custom paper, adjust the paper feed amount for that custom paper. For details on the
method for adjusting the paper feed amount, see "Automatic Banding Adjustment." ➔P.527
Warnings
Warnings
Take note of the following warnings when added custom paper other than Canon genuine paper and feed con-
firmed paper to the printer driver and the printer itself.
About the Cutter
•
Depending on the paper, there are types that cannot be cut by the cutter unit, and types that speed deteriora-
tion of the blade and cause damage to the cutter. For thick paper, hard paper, etc. do not use the cutter unit,
and instead cut the roll paper using scissors, etc. after printing. In this case, select User Cut as the Automatic
Cutting Settings in the Roll Paper Settings dialog box.
Note
• If the cutter is damaged, contact your Canon dealer for assistance.
• For details on the methods for cutting roll paper, see "Specifying the Cutting Method for Rolls." ➔P.351
About the Printhead
•
If the printhead rubs against the paper during printing, this may cause damage to the printhead. If the print-
head is rubbing against the paper, configure the Vacuum Strength in the Step 5: Configure the amount of
ink used dialog box as follows.
iPF8400SE
Warnings
User's Guide
Handling and Use of Paper Media Configuration Tool (Mac OS)
423


