


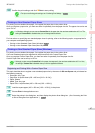
Register a Custom Paper Sizes
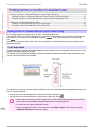
This example describes how to register and print using a page size that is horizontally elongated and suitable for
banners in either horizontal or vertical format.
1
Create the document in the application.
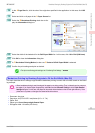
2
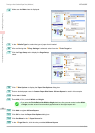
Choose Print in the application menu.
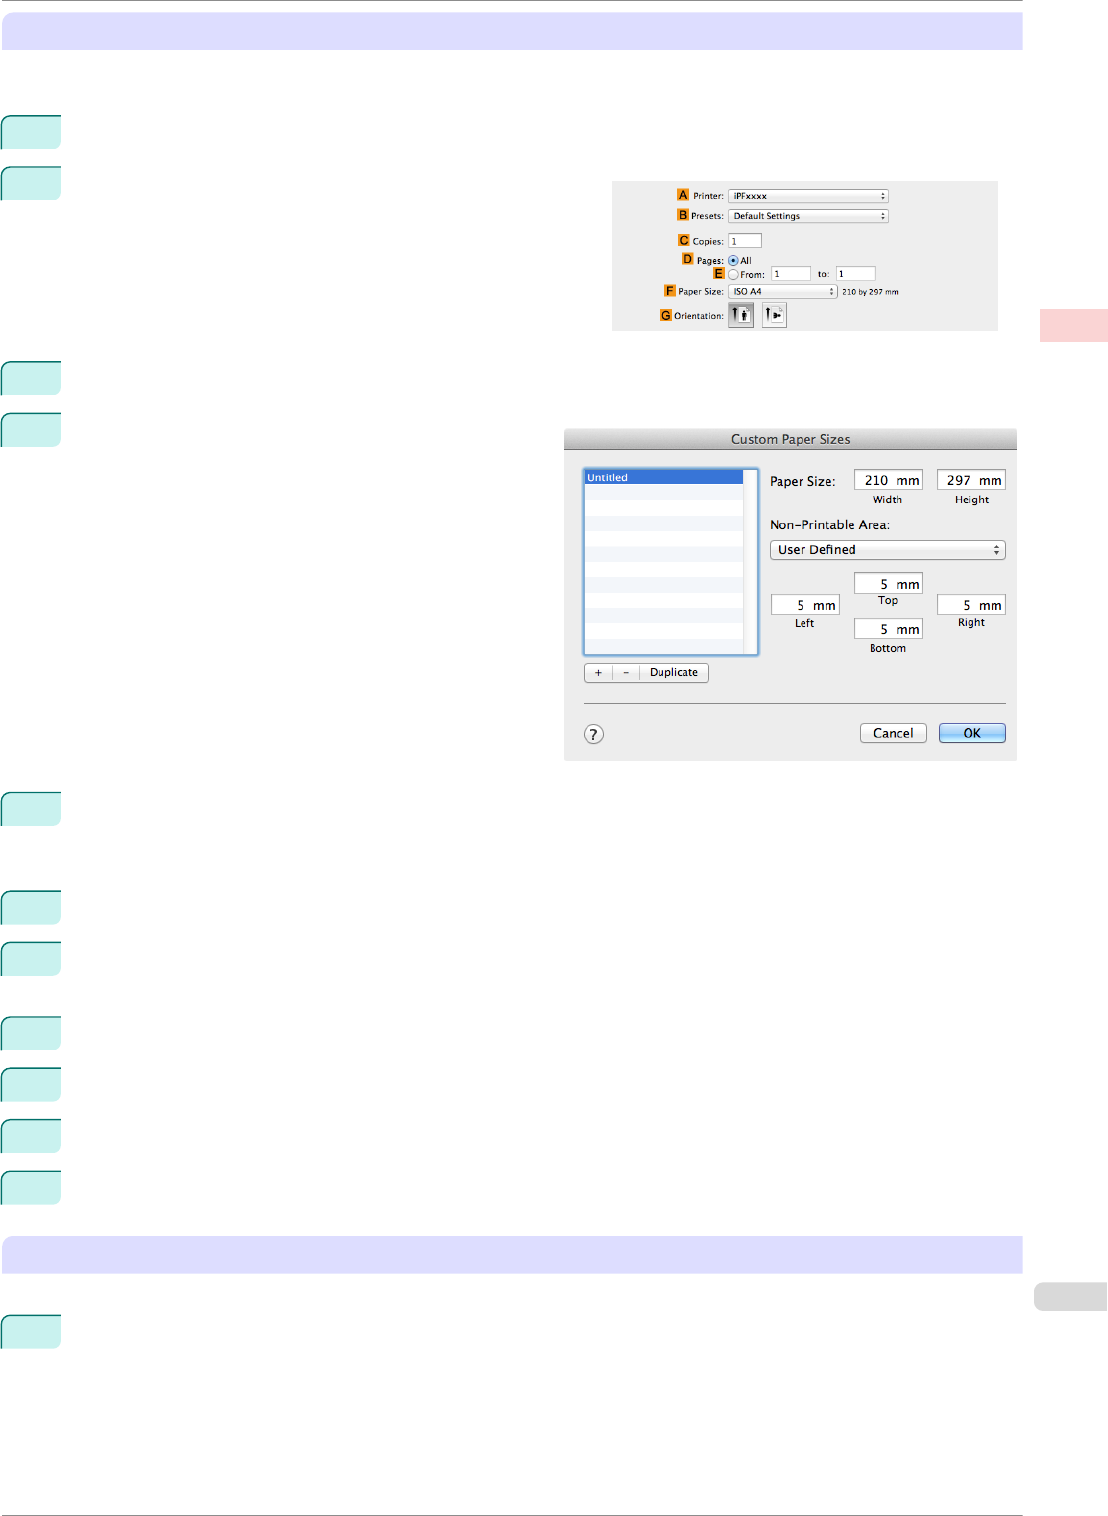
3
Select the printer in the A Printer list.
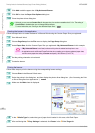
4
Click Manage Custom Sizes in the F Paper Size list
to display the Custom Paper Sizes dialog box.
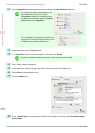
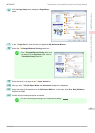
5
Double-click Untitled in the list at left, and then enter a name for the page size you want to register. Here,
enter 100*500.
If the Untitled size is not listed at left, click + below the list.
6
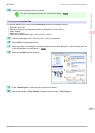
Under Paper Size, enter 10 in Width and 50 in Height. Here, measurements are entered in centimeters.
7
Specify the margins by entering 0.3 in Non-Printable Area. Here, too, measurements are entered in centi-
meters.
8
Click OK to close the Custom Paper Sizes dialog box.
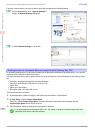
9
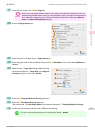
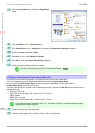
In the F Paper Size list, click the size of the original. In this case, click 100*500, the size you registered.
10
In G Orientation, click the icon of the document in landscape orientation.
11
If you configured the settings using the Page Attributes dialog box, click OK to close the dialog box.
Print the banner
Follow the steps below to print the banner using the corresponding banner settings.
1
Choose Print in the application menu.
iPF8400SE
Printing Vertical or Horizontal Banners (Large-Format Printing; Mac OS)
User's Guide
Enhanced Printing Options Printing banners or at other non-standard sizes
85