


1-15
Cisco VISM Installation and Configuration Guide
Release 3.0, Part Number OL-2521-01 Rev. D0, June 2004
Chapter 1 Overview of the VISM and VISM-PR Cards
Installing VISM Hardware and Software
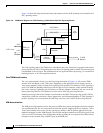
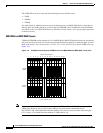
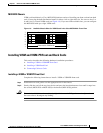
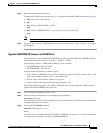
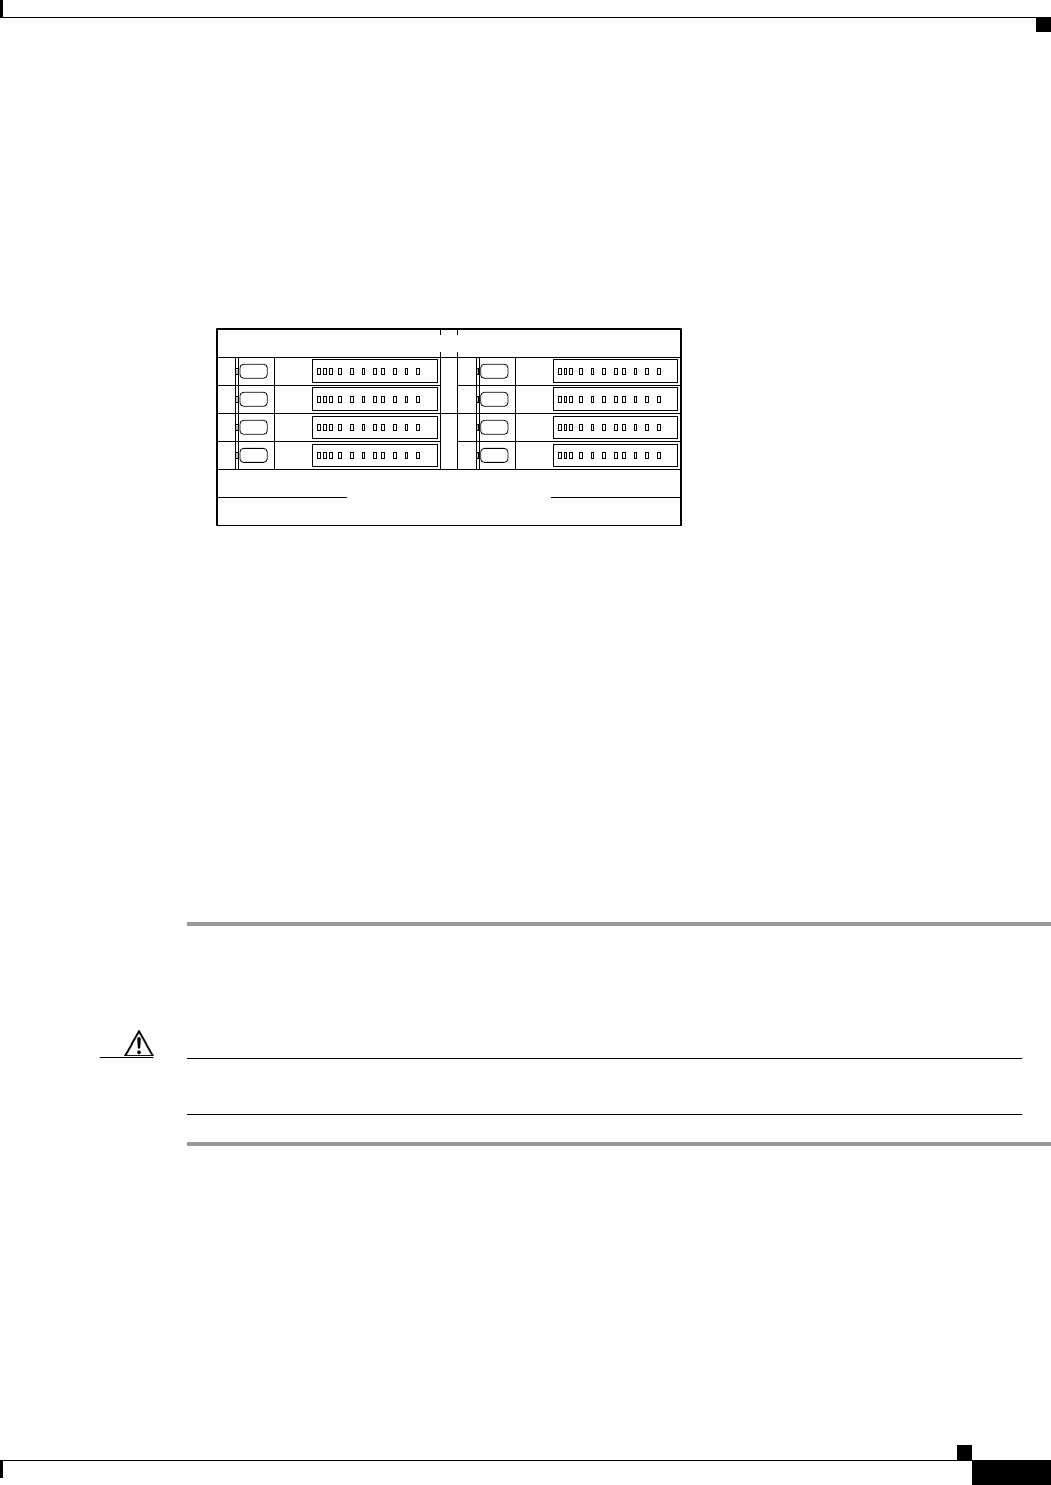
MGX 8230 Chassis
VISM card installation in a Cisco MGX 8230 platform consists of installing one front card and one back
card (if not using the bulk distribution feature) in either a left or right shelf slot. You can use slots 3 to
6, and 10 to 13 to install VISM cards (see Figure 1-9). If you use all the available slots, you can configure
the MGX 8230 with up to eight VISM cards.
Figure 1-9 Available Chassis Slots for VISM Cards in the Cisco MGX 8230—Front View
Installing VISM and VISM-PR Front and Back Cards
This section describes the following hardware installation procedures:
1. Installing a VISM or VISM-PR Front Card
2. Installing a VISM Back Card
3. Connecting Cables to Cards
Installing a VISM or VISM-PR Front Card
Complete the following instructions to install a VISM or VISM-PR front card:
Step 1 Position the rear card guides over the appropriate slot in the chassis.
Step 2 Gently slide the card all the way into the slot and press the insertion/extractor lever until it snaps into
the vertical (MGX 8250 or MGX 8850) or horizontal (MGX 8230) position.
Caution The card should slide in and out with only slight friction on the EMI gaskets on the adjacent board.
Do not use force. Investigate any binding.
VISMVISMVISMVISM
VISMVISMVISMVISM
1
2
3
4
5
6
7
8
9
10
11
12
13
14
Reserved for SRM cards
Reserved for PXM cards
57104