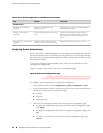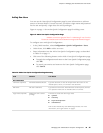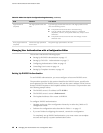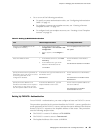
To create user accounts:
1. Navigate to the top of the configuration hierarchy in either the J-Web or CLI
configuration editor.
2. Perform the configuration tasks described in Table 15 on page 18.
3. If you are finished configuring the network, commit the configuration.
Table 15: Creating User Accounts
CLI Configuration EditorJ-Web Configuration EditorTask
From the [edit] hierarchy level, enter
edit system login
1.
In the J-Web interface, select
Configuration>View and
Edit>Edit Configuration.
2.
Next to System, click Configure or
Edit.
3.
Next to Login, click Configure or
Edit.
Navigate to the System Login level in
the configuration hierarchy.
Set the username and the login class for
the user:
set user cmartin class superuser
1.
Next to User, click Add new entry.
2.
In the User name box, type cmartin.
3.
In the Class box, type superuser.
4.
Click OK.
Create a user named cmartin who
belongs to the superuser login class.
Set the encrypted password for cmartin.
set user cmartin authentication
encrypted-password
$1$14c5.$sBopasdFFdssdfFFdsdfs0
1.
Next to Authentication, click
Configure.
2.
In the Encrypted password box,
type
$1$14c5.$sBopasdFFdssdfFFdsdfs0
3.
Click OK.
Define the encrypted password for
cmartin.
Setting Up Template Accounts
You can create template accounts that are shared by a set of users when you are
using RADIUS or TACACS+ authentication. When a user is authenticated by a
template account, the CLI username is the login name, and the privileges, file
ownership, and effective user ID are inherited from the template account.
This section contains the following topics:
■ Creating a Remote Template Account on page 19
■ Creating a Local Template Account on page 20
18 ■ Managing User Authentication with a Configuration Editor
J-series™ Services Router Administration Guide


