68
3
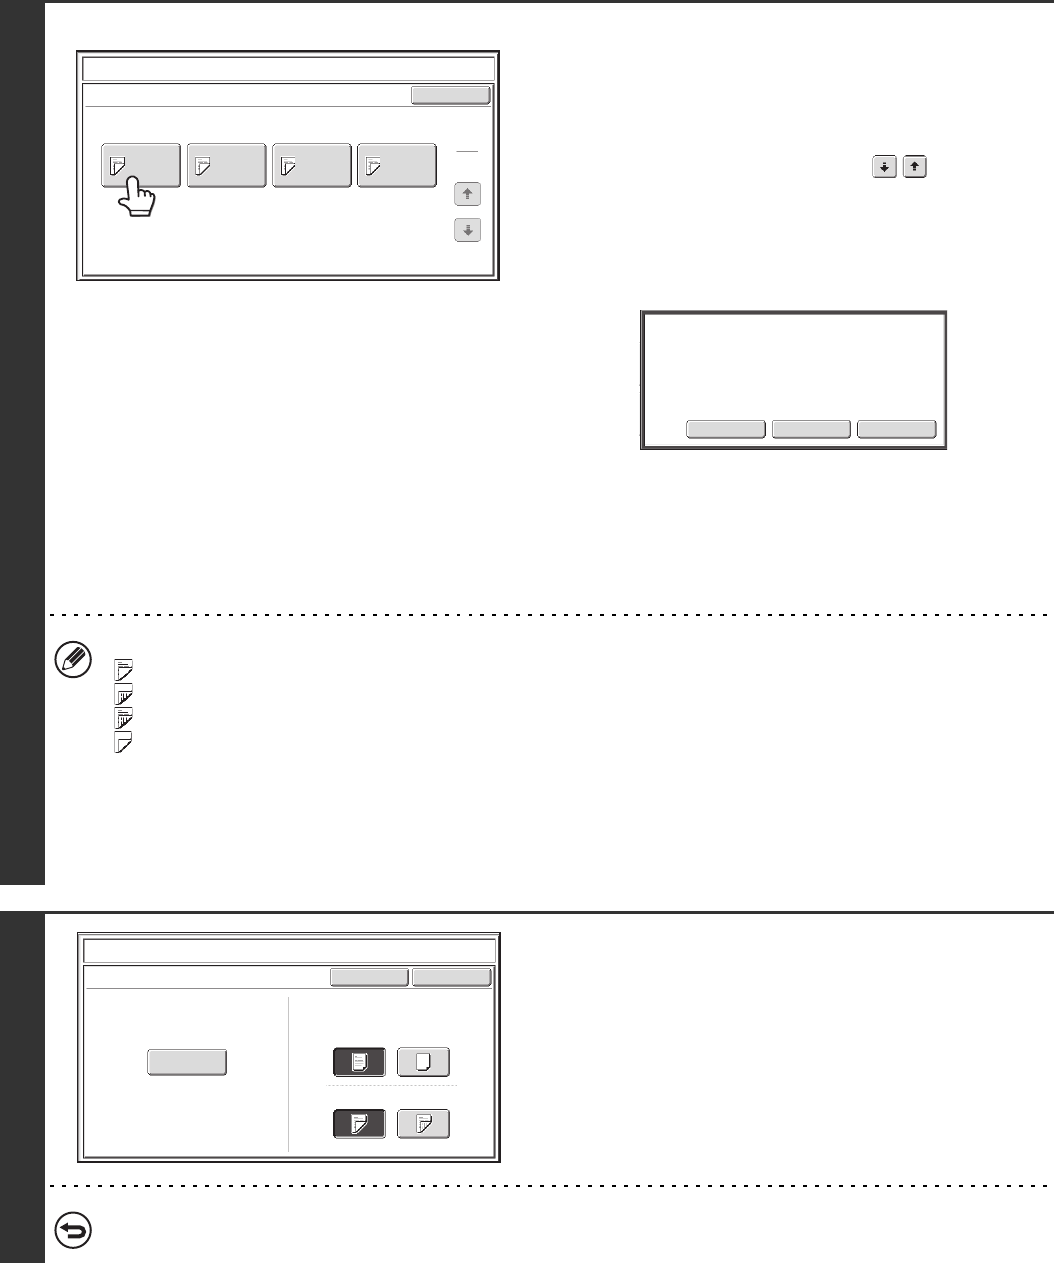
Example: Touch insert A at page 4
Touch the key of the page that you wish
to delete or change.
If you do not need to change the setting, touch the [OK] key
and go to step 6.
• Each key shows a print image icon and the insertion page.
• If there are multiple screens, touch the keys to move
through the screens.
To edit a cover, touch the [Front Cover] key or the [Back Cover]
key and go to step 4.
Touch the key of the insertion page that you want to edit or
clear. The following screen will appear.
• To delete the page, touch the [Delete] key. After deleting the
key, touch the [OK] key and go to step 6.
• To edit the page, touch the [Modify] key.
To edit an insert, touch the [Insertion Type A] key or the
[Insertion Type B] key and go to step 5.
• To cancel, touch the [Cancel] key.
Icons
: Copy on front side only
: Copy on reverse side only
: 2-sided copy
: Do not copy
For inserts, the insertion page also appears.
* represents a page number.
*/-: Copy only on front side at page *
*/*: 2-sided copy at page */*
<*: Insert without copying at page *
4
Change the front/back cover settings.
The settings are changed in the same way as they are initially
configured. See step 4 of "INSERTING COVERS IN COPIES
(Cover Settings)" (page 60) to change the cover settings.
After changing the settings, touch the [OK] key and return to
step 3.
To cancel cover settings...
Touch the [Cancel] key.
Covers/Inserts
Page Layout
OK
1
1
Insertion
Type A
4/-
Insertion
Type B
7/-
Insertion
Type B
9/-
Insertion
Type A
12/-
Modify
the insertion?
ModifyDeleteCancel
Co
vers/Inserts
Cancel
Front Cover Setting
OK
Paper Tray
Print on Front Cover
Yes
8½x11
Plain
No
2-Sided1-Sided
Bypass
Tray
