85
4
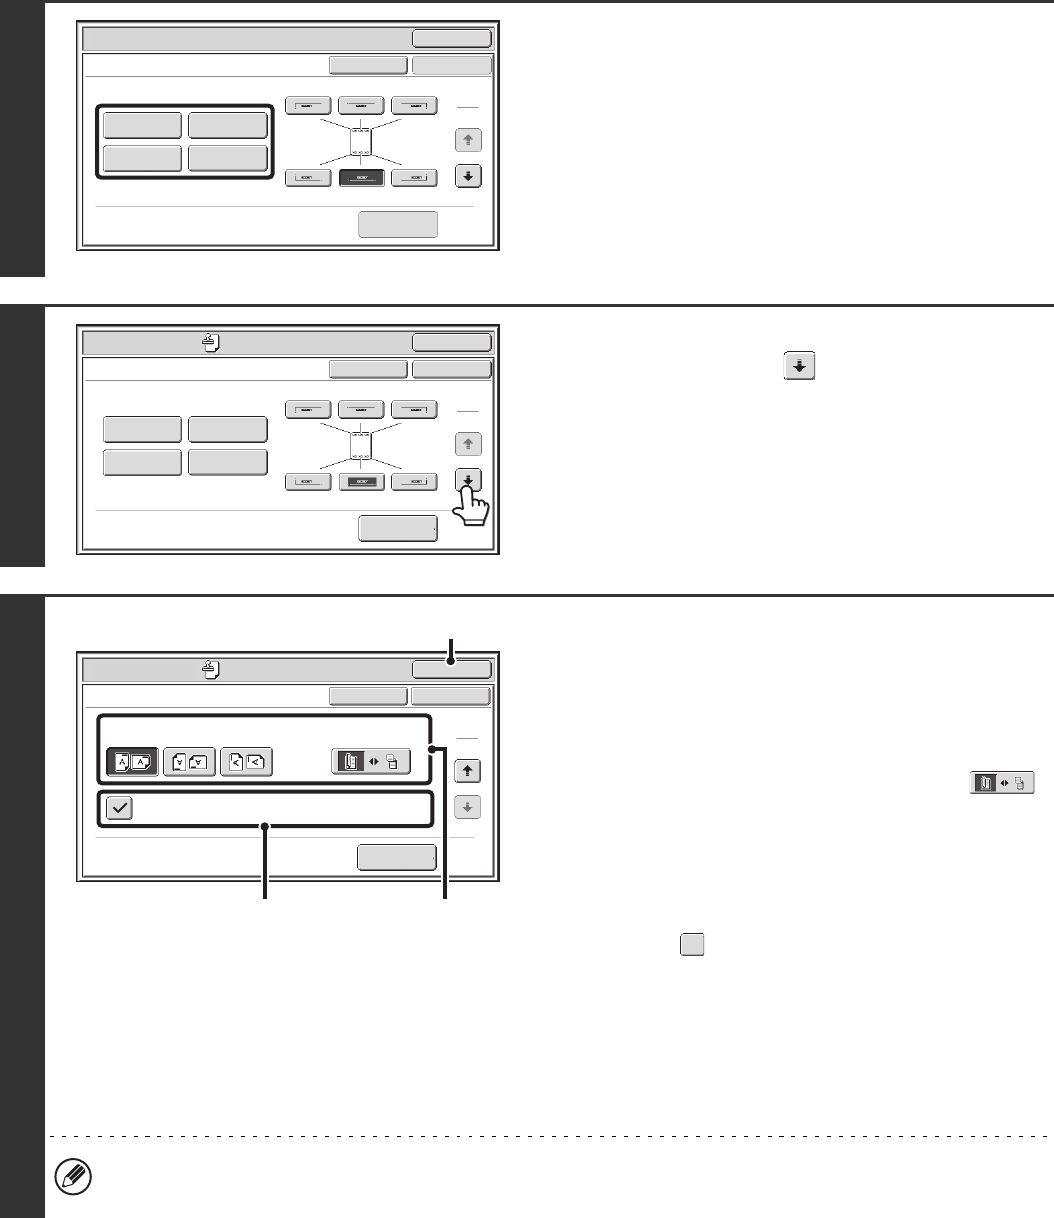
Select Stamp.
For detailed information on each of the stamp items, see the
following sections:
Date: ADDING THE DATE TO COPIES (Date)
(page 87)
Stamp: STAMPING COPIES (Stamp) (page 89)
Page numbering: PRINTING PAGE NUMBERS ON COPIES
(Page Numbering) (page 91)
Text: PRINTING TEXT ON COPIES (Text) (page
95)
5
When you have finished selecting stamp
settings, touch the key.
6
Select settings for the original and
covers/inserts.
(1) Touch the [Original Orientation] key and
specify the orientation of the placed
original.
If 2-sided originals have been placed, touch the
key and specify the binding position (booklet binding or
tablet binding) of the originals.
(2) Select stamp settings for covers/inserts.
If you do not want to print the stamp items on
covers/inserts, touch the checkbox to remove the
checkmark .
(3) Touch the [OK] key.
You will return to the base screen of copy mode.
To edit a stamp position or delete a stamp item, touch the
[Layout] key.
☞ CHECKING THE STAMP LAYOUT (Layout) (page
99)
• When copying on covers/inserts is not selected, printing will not take place even if a checkmark appears.
• This setting cannot be selected if insertion of covers and inserts is disabled in the system settings (administrator).
OK
Special Modes
Stamp
OK
Layout
Cancel
Date
Page
Numbering
Text
Stamp
1
2
OK
Special Modes
Stamp
OK
Layout
Cancel
Date
Page
Numbering
Text
Stamp
1
2
Special Modes
OK
OK
Stamp
Cancel
Original Orientation
Print on Covers/Inserts when Copying on Covers/Inserts
2-Sided Original Type
2
2
Layout
(2) (1)
(3)
