8-5
Applications: Expense
Note:
As soon as you select an expense type, your SPT 1700 terminal
saves your entry. If you do not select an expense type, it does not
save the entry.
Tip: Here’s a quick way to create a new expense item: make sure that no item in
the Expense List has been selected, then write the first letter(s) of the expense
type, followed by the numerical amount of the expense item. This technique takes
advantage of the application’s automatic fill feature. Refer to
Options Menu
later in
this chapter for details.
Changing the Expense Item Date
Initially, expense items display with the date you enter them on your SPT 1700 terminal.
You can use the Expense application to change the date associated with any expense item.
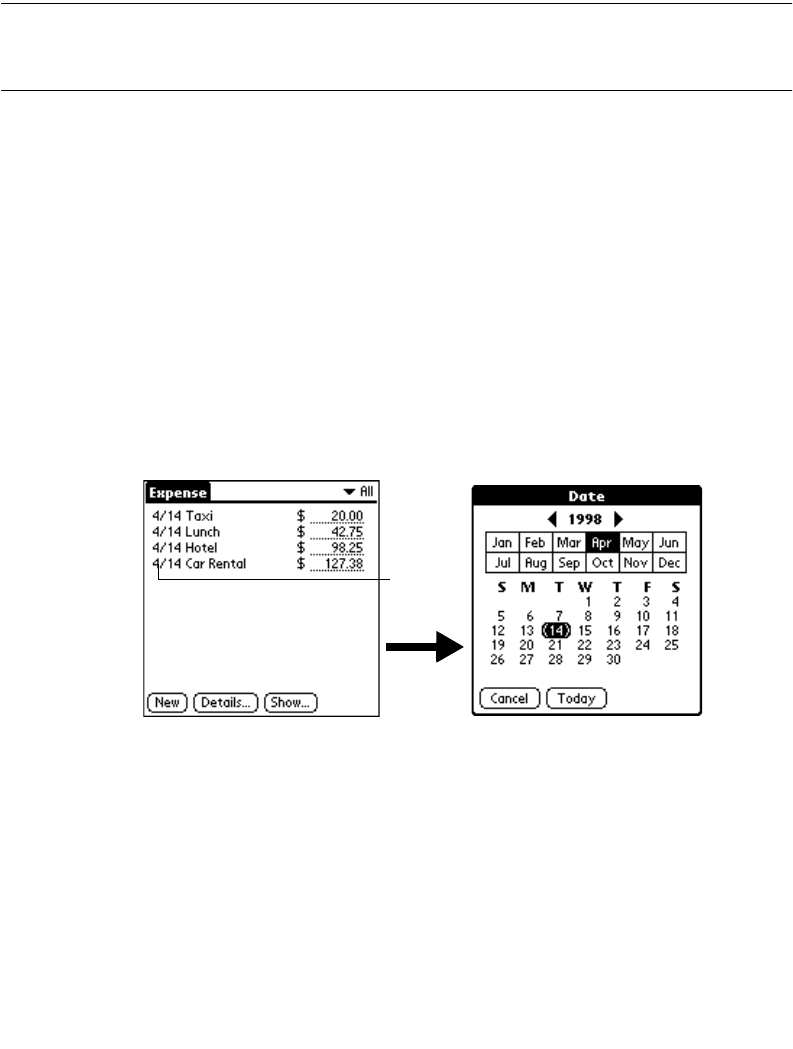
To change the date of an expense item:
1. Tap the expense item you want to change to highlight the date.
2. Tap the date of the selected item to open the Date screen.
3. Tap the date you want for the expense item.
For more information about the Date screen, refer to
Scheduling an Event
on page 7-4.
Entering Receipt Details
The Expense application provides a variety of options that you can associate with an item.
These options display in the Receipt Details screen.
Tap date
