PresentationPRO-II • User’s Guide 35
4. Menu Orientation
Input Menu
páòáåÖ=jÉåì
From the Input Menu, press {SIZING} to display one of two Sizing Menus. These menus
are context sensitive — they
change depending on the Sampling Mode selected on the
Input Menu.
• If 1:1 Sampling is selected, the 1:1 Sizing Menu appears.
• If Oversample is selected, the Oversample Sizing Menu appears.
Each menu and function is described below.
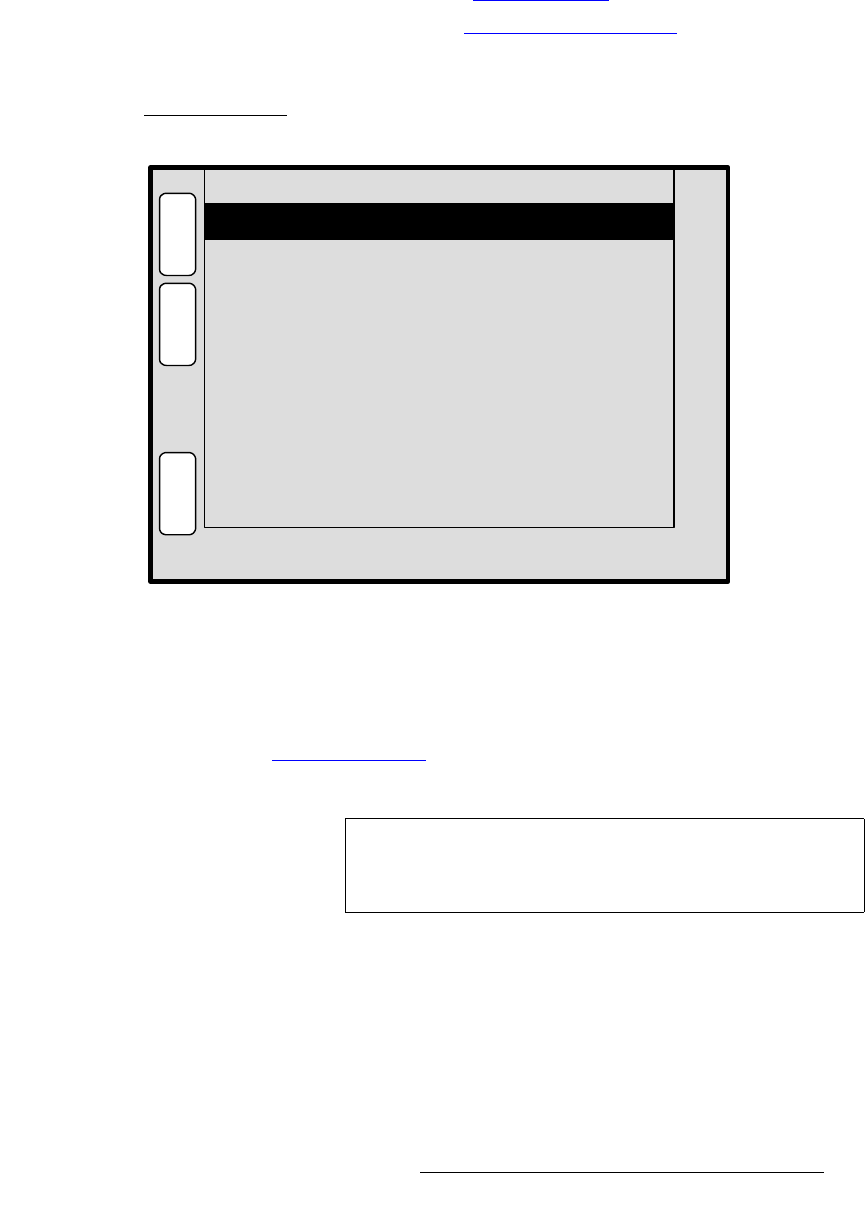
NWN=páòáåÖ=jÉåì
The figure below illustrates a sample 1:1 Sizing Menu.
Figure 4-7. 1:1 Sizing Menu (sample)
• Clock Phase — sets the system’s A/D converter, allowing you to select where
pixels are sampled (ideally, on the pixel’s peak). The adjustment range is
-16 to
15. For optimum visual results when adjusting high-resolution computer sources,
project a burst test pattern and adjust the sampling for the minimum noise. Refer
to the “
Test Pattern Menu” section on page 42 for information.
• H Total — sets the total pixel count per line.
• H Active — sets the width of the active area.
• H Position — sets the start of the active area’s horizontal offset from H sync.
• V Total — fixed value which cannot be adjusted.
• V Active — sets the number of vertical lines in the image.
• V Position — sets the start of the active area’s vertical offset from V sync.
• Press {SAVE} to save the selected input in the designated input file.
H Active
H Position
V Total
H Total
V Active
V Position
[ 858 ]
720
[ 0 ]
486
36
H
O
M
E
N
A
V
A
D
J
1:1 SIZING SRC_3
Clock Phase 0
123
S
A
V
E
B
A
C
K
Note
This field is not adjustable for digital sources (including both
the DVI and BNC input connectors), or for NTSC and PAL
sources, regardless of connection type.


