


Scanning 77
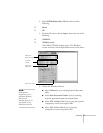
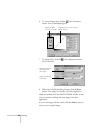
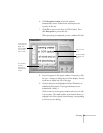
5. Click the Paper Size button that corresponds to the page
you’re scanning.
6. Choose one of the following Scan Mode buttons:
■ Color
: for documents printed in color
■ Grayscale
: for documents that include black and
white photographs or artwork with subtle shading
■ Black&White
: for documents that include black text
only or text with black line drawings
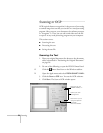
7. If you’re using the document table to scan more than one
page, click
Scan Multiple Images.
8. If you’re using the optional automatic document feeder,
click
Enable ADF
.
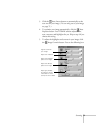
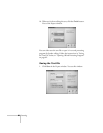
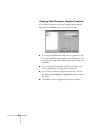
9. If you want to scan the entire page, go to step 10. If not,
click the
Preview
button. The EPSON Stylus Scan scans
your document and displays a preview in the scan window
on your screen.
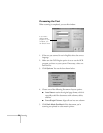
10. Click and drag the dotted-line border on the preview to
define the area you want to scan. You can adjust any of
your other settings at this point.
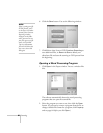
11. Click the
Scan
button to begin your scan.
12. If you selected
Scan Multiple Images
, a message appears
asking if you want to continue scanning.
If you click
Yes to scan more images, replace the page on
the document table and repeat steps 9 through 12.
If you click
No, follow the steps in the next section to
process or “recognize” the text.
note:
If you’re an advanced
user and want more
control over your
settings, click the
TWAIN button. See
page 70 for
information about
using the TWAIN
settings.
note:
You can’t use the
Preview button if
you’re using the
automatic document
feeder.