


DFX-8500
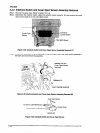
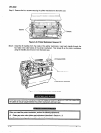
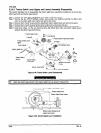
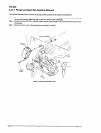
3.2.6.3 Tractor Select Lever (Upper and Lower) Assembly Disassembly
This section describes how to disassemble the tractor select lever assembly, including how to remove the
ribbon feed motor and tractor select sensor.
Step 1:
Step 2:
step 3:
Step 4:
Step 5:
Step 6:
Remove the ribbon feed change lever unit. (Refer to Section 3.2.6.2.)
Remove the two CP(.%Pl)(M3x6) screws, leaf springs, and washers securing the ribbon feed
motor to the ribbon feed motor frame and remove the motor.
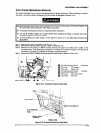
Remove the E ring (# 3) securing the upperkwer tractor select levers and remove the levers
Remove the E ring (# 3) securing the tractor select cam and remove the cam.
Remove the CPS(Pl)(M2xlO) screw securing the tractor select tensor and remove the sensor.
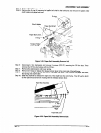
Using wire cutters, cut the wire band securing the ribbon feed motor and tractor select sensor
cables to the ribbon feed motor frame.
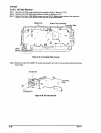
Tractor Select Cam
\
$
e Washer
Tractor Select Transmission Gear
Tractor Select Lever
Tractor Select
Transmission Gear
Tractor Select
Ribbon Feed MO
Figure 3-49. Tractor Select Lever Disassembly
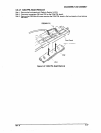
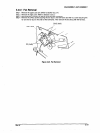
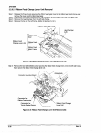
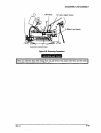
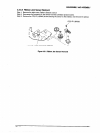
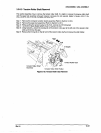
0 Attach the tractor select /evers to the tractor select cam as shown in Figure 3-50.
bon Feed Motor Frame
Tractor Select Cam
Tarctor Select Gear
Holder
Ribbon Feed Change Lever
(Upper and Lower)
Figure 3-50. Tractor Select Lever Installation
3-34
Rev. A