


13 - 18
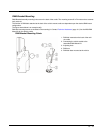
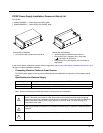
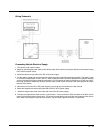
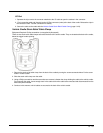
DC/DC Power Supply Installation, Screws on Top of Lid
For use with Honeywell power supplies:
• 9000301PWRSPLY – Power Supply, 18-60VDC with cable
• 9000302PWRSPLY – Power Supply, 60-110VDC with cable
If your DC to DC power supply does not look like the image above, see DC/DC Power Supply Installation, Screws on Side
of Lid (page 13-15) for installation instruction.
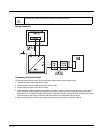
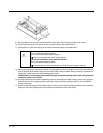
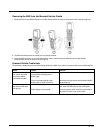
Connecting Electrical Cables to Power Sources
The DC to DC power supply is used to provide vehicle power to the MX9 when placed in a DC powered vehicle cradle.
Specifications for Electrical Supply
Note: Refer to the Wiring Schematic that follows for wiring colors and connections.
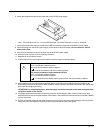
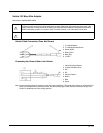
Shown With Lid Attached
• Lid is secured with screws on the top of lid.
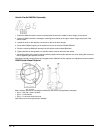
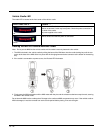
Shown With Lid Removed
• Input and output connector blocks under lid.
• Two positive (+), negative (-) and ground ( )
connections per terminal block
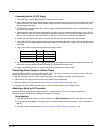
Input Voltage Always observe input voltage range specified on the DC to DC power supply.
Output Voltage 12 VDC ± 10%
Power 60 W
Fuse 5 A (slow blow fuse). Fuses are USER SUPPLIED
Caution: For proper and safe installation, the input power cable must be connected to a fused circuit on the
vehicle. This fused circuit requires a five Amp maximum time delay (slow blow) high interrupting
rating fuse. If the supply connection is made directly to the battery, the fuse should be installed in the
positive lead within 5 inches of the battery positive (+) terminal. Note: For North America, a UL
Listed fuse is to be used.
Caution: Usage in areas where moisture can affect the power supply connections should be avoided. The
power supply should be mounted in a dry location within the vehicle or placed in a suitable protective
enclosure.
Caution: For installation by trained service personnel only.
Warning: Risk of ignition or explosion. Explosive gas mixture may be vented from battery. Work only in well
ventilated area. Avoid creating arcs and sparks at battery terminals.
!
!
!
!