


2 - 18
Installing the SIM Card
Tools required: standard size Phillips screwdriver (not supplied).
Note: Installing or removing accessories should be performed on a clean, well-lit surface. When necessary, protect the work
surface, the MX9, and components from electrostatic discharge.
Note: Contact Technical Assistance (page 15-1) if you need help when installing or removing a SIM card.
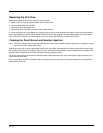
The expansion slots in the MX9 are accessible via the hatch. The hatch can be opened using a standard size screwdriver. When
the hatch is opened, the MX9 automatically shuts down. It is good practice to save any changes then perform an orderly
shutdown to preserve RAM contents before opening the hatch.
When the hatch is open during this procedure, do not remove any cables or allow them to kink.
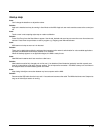
When the hatch is being closed, carefully move cables and wires back into the cavity before securing the hatch.
Before securing the hatch completely, examine the seam between the front and back half of the MX9. If the gasket is off-center,
loosen the screws a little, adjust the gasket and re-tighten the screws.
Press the Power button to turn the MX9 on.
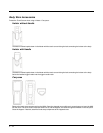
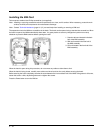
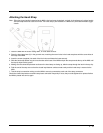
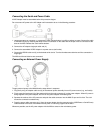
1. Summit radio card located in the back
half of the MX9 assembly.
2. SIM card located in the front half of
the MX9 assembly.
3. SD card located in the front half of the
MX9 assembly.