


13 - 22
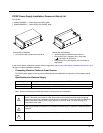
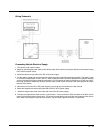
Connecting Vehicle 12 VDC Supply
1. The power cable must be UNPLUGGED from the MX9 vehicle cradle.
2. While observing the fuse requirements specified above, connect the power cable as close as possible to the actual
battery terminals of the vehicle. When available, always connect to unswitched terminals in the vehicle fuse panel,
after providing proper fusing.
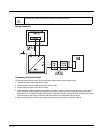
3. ATTENTION: For uninterrupted power, electrical supply connections should not be made at any point after the igni-
tion switch of the vehicle.
4. Route the power cable the shortest way possible. The cable is rated for a maximum temperature of 105°C (221°F).
When routing this cable it should be protected from physical damage and from surfaces that might exceed this tem-
perature. Do not expose the cable to chemicals or oil that may cause the wiring insulation to deteriorate.
5. Always route the cable so that it does not interfere with safe operation and maintenance of the vehicle.
6. Use proper electrical and mechanical fastening means for terminating the cable. Properly sized “crimp” type electri-
cal terminals are an accepted method of termination. Select electrical connectors sized for use with 18AWG (1mm2)
conductors.
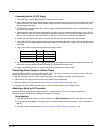
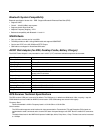
7. Wiring color codes for Honeywell supplied DC input power cabling:
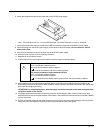
8. Provide mechanical support for the cable by securing it to the vehicle structure at approximately one foot intervals,
taking care not to over tighten and pinch conductors or penetrate outer cable jacket.
9. Refer to the following sections to complete the power connection to the vehicle cradle.
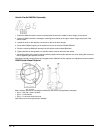
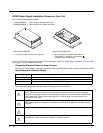
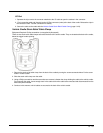
Connecting Power Supply to Vehicle Cradle
The power cable connector is L-shaped. The long end of the L (the cable) will be facing up towards the strain relief cable
clamps. The Power port is on the back of the vehicle cradle.
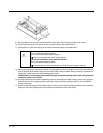
1. Align the connector pins to the vehicle cradle Power port; firmly pushing the connector into the Power port.
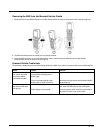
2. Tighten the nut of the plug clockwise until the power cable is securely fastened.
3. Secure the cable to the cradle with the Vehicle Cradle Strain Relief Cable Clamp (page 13-23).
4. The power LED on the MX9 illuminates when it is receiving external power and the MX9 is docked.
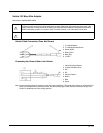
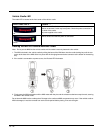
Attaching a Serial or I/O Connector
The serial cable can originate with a tethered scanner, a desktop/laptop PC, a printer or another serial device.
Periodically test the connections for stability and re-tighten if necessary.
Serial Interface
1. Align the RS232 serial cable end (female) carefully to the Serial Interface port (male) at the back of the cradle.
2. Firmly press the ends together and finger tighten the screws on either side of the connector. Test the connection for
stability.
3. Secure the cable to the cradle with the Vehicle Cradle Strain Relief Cable Clamp (page 13-23).
Vehicle Supply Wire Color
+12 VDC DC + Brown
Return DC - Blue
Vehicle Chassis GND Green