


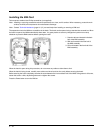

2 - 22
Connecting Cables to the MX9
Note: Do not connect or disconnect cables in a Hazardous location.
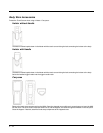
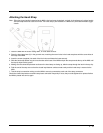
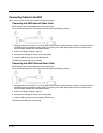
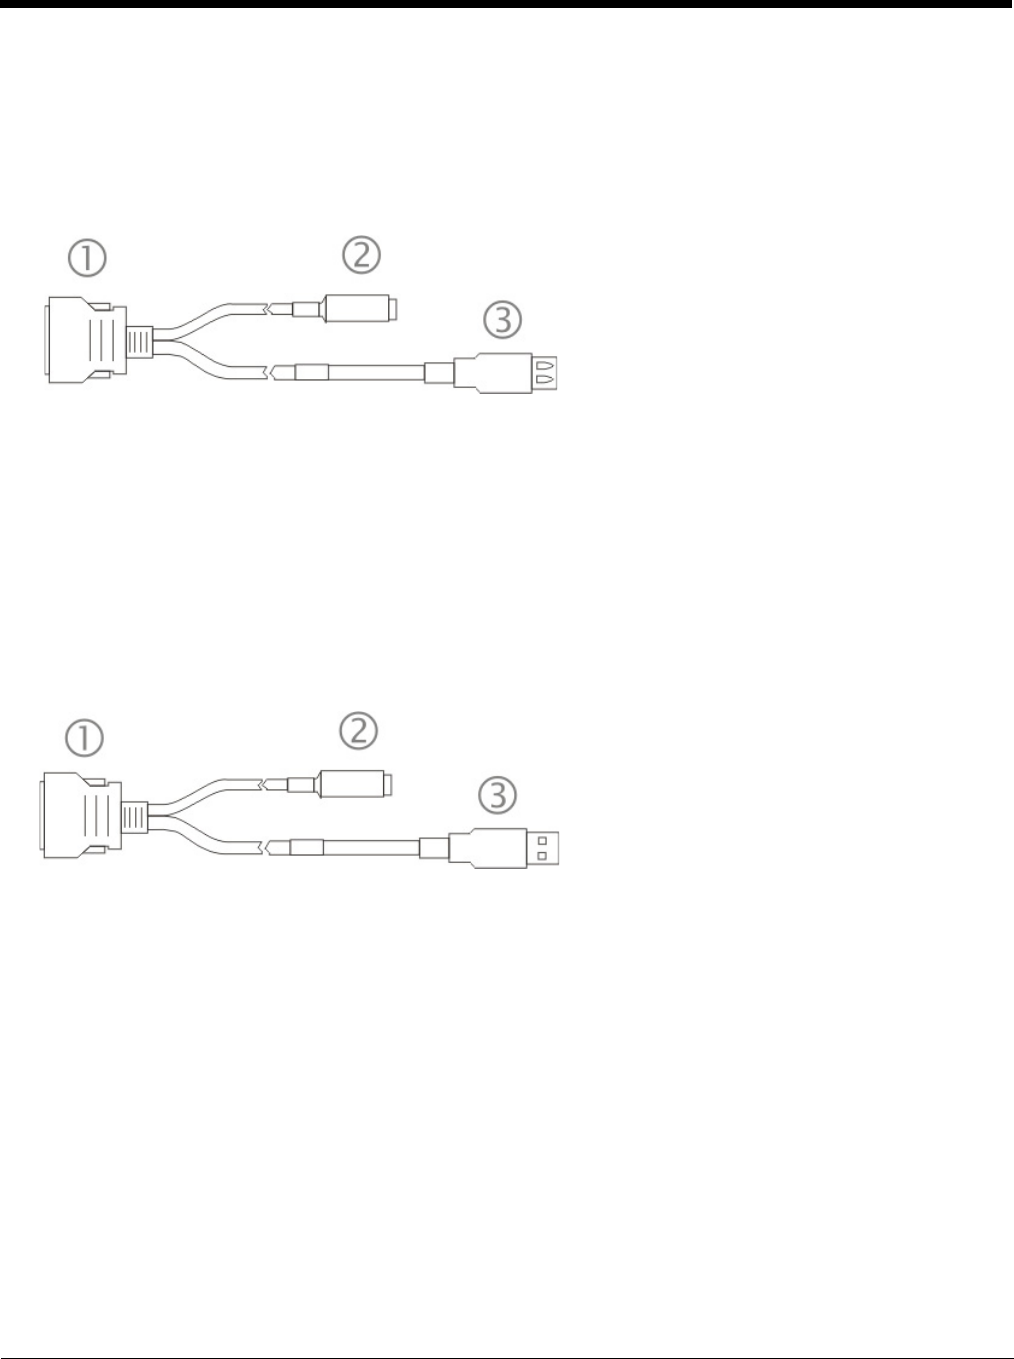
Connecting the USB Host and Power Cable
AC/DC Adapter must be assembled before this process begins.
Do not connect AC power to the AC Adapter until instructed in the following procedure:
1. Holding the cable I/O connector (1), pinch the catch release buttons in until the catches are open. Connect the cable to
the MX9 I/O port by matching the shape of the I/O connector on the cable with the shape of the I/O connector at the
base of the MX9. Release the catch release buttons.
2. Insert the AC adapter single pin cable (2).
3. Connect the AC Adapter to a power source (wall outlet).
4. Insert the USB host plug (3) into the USB Host port.
The MX9 and the host device are connected.
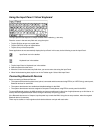
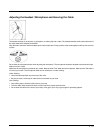
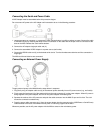
Connecting the USB Client and Power Cable
AC/DC Adapter must be assembled before this process begins.
Do not connect AC power to the AC Adapter until instructed in the following procedure:
1. Holding the cable I/O connector (1), pinch the catch release buttons in until the catches are open. Connect the cable to
the MX9 I/O port by matching the shape of the I/O connector on the cable with the shape of the I/O connector at the
base of the MX9. Release the catch release buttons.
2. Insert the AC adapter single pin cable (2) .
3. Connect the AC Adapter to a power source (wall outlet).
4. Insert the USB client plug (3) into the target USB Client port.
The MX9 and the USB client are connected.