


MJ-1103/1104 © 2008, 2009 TOSHIBA TEC CORPORATION All rights reserved
ADJUSTMENTS
5 - 2
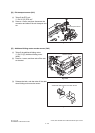
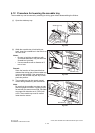
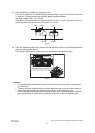
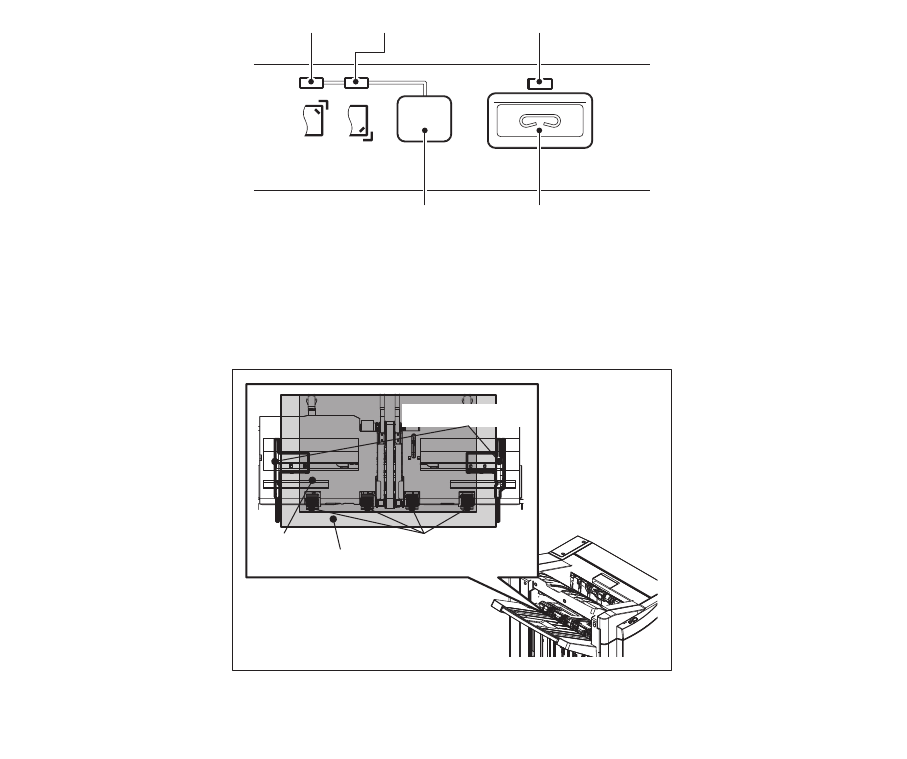
(5) Press the [Button1] to adjust the alignment position.
Every time the [Button1] is pressed, the alignment plate shifts 1 step (0.419 mm/step) toward the
“+ “direction. (The gap between the alignment plates becomes narrower.)
Adjustment range is from -5 to +5 steps.
If the [Button1] is pressed when the alignment position is at the “+5 step”, the plate will return to
the home position and then moves to the position of “-5 step”.
Fig. 5-2
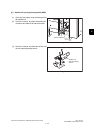
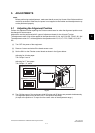
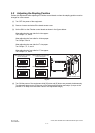
(6) Place the adjustment sheet on the process tray and adjust the position to make the gap between
paper and the alignment plate “0”.
Then setting is performed at a value that is one smaller than the adjustment value.
Fig. 5-3
Remarks:
• Use an adjustment sheet made of plastic resin which is light and accurate in measurement
(e.g. OHP film).
• To reduce frictional resistance with the vertical alignment roller on the process tray, place a
sheet of B5 paper beneath the adjustment sheet on the vertical alignment roller.
• Confirm the gap between paper and the alignment plate by moving the adjustment sheet for-
ward and backward to reduce affect by backrush of the gear of the side alignment plate.
LED3 LED2 LED1
Button2Button1
Adjustment sheet
Vertical
alignment roller
B5 paper
alignment plate