


PhaserShare Networking Manual
101
Windows NT
10
Creating an LPR port
1.
To connect via TCP/IP, double-click LPR Port in the Printer Ports dialog
box. If LPR Port is not listed in this box, the Microsoft TCP/IP Printing
Service must be installed on the NT machine:
a.
Click Start, Settings, Control Panel, and Network.
b.
Click Services, then click Add.
c.
Select Microsoft TCP/IP Printing, then click OK and install this
service. The original Windows NT distribution CD-ROM is needed
during installation.
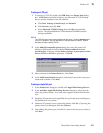
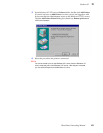
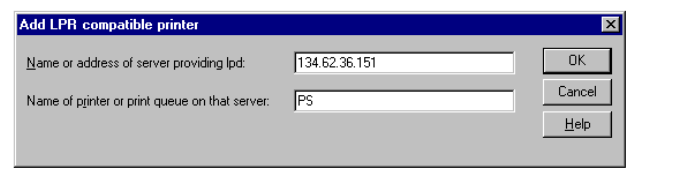
2.
In the Add LPR compatible printer dialog box, enter the printer's IP
address or DNS name in the box labeled Name or address of server
providing lpd. In the box marked Name of printer or print queue on that
server, enter PS or AUTO in uppercase. Click OK.
3.
When returned to the Printer Ports box, click Close.
4.
At the Add Printer Wizard dialog box, click the box next to this new port; a
check mark is added. Click Next.
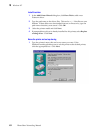
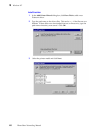
Creating an AppleTalk port
1.
In the Printer Port dialog box, double-click AppleTalk Printing Devices.
2.
In the Available AppleTalk Printing Devices dialog box, select the zone
where the printer resides. If no zone name appears, double-click the zone
icon.
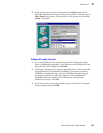
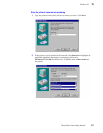
3.
Windows NT searches for all AppleTalk devices in that zone and displays a
list; double click your printer.
4.
Windows NT prompts you to capture the printer; click No. (Capturing the
printer causes it to disappear from the Chooser.)
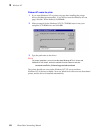
5.
After adding the printer port, click the box next to the new port to select it;
click Next.
N
O
T
E
The TCP/IP protocol must also be installed on the server. Click the Protocol tab to
verify if it is installed. See your Windows NT documentation for details. Reboot
Windows NT after installing TCP/IP.