PhaserShare Networking Manual
47
PhaserShare Administrator Software for NetWare Networks
5
4.
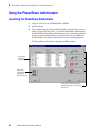
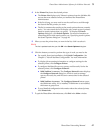
In the Printer List, locate the desired printer.
■ The Printer List displays only Tektronix printers from the NetWare file
servers that were attached when you launched the PhaserShare
Administrator.
■ If the list is long, you may need to use the scroll bar to scroll through
the list and find the printer you want.
■ The list is constructed according to the search options that are currently
active. You can control the list to display only certain types of printers
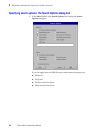
based on search options that you specify. To display the Search
Options dialog box, click Search Options. For more information on
controlling the list with search options, see “Specifying search options:
the Search Options dialog box” on page 48.
5.
When you see the printer that you want in the list, click it to select it.
6.
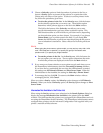
Click the button you need to perform the type of work you need to do:
■ For a quick, first-time installation, click Quick Configuration. See
Chapter 4, “Novell NetWare Configuration” for more information.
■ To display job accounting information or configure settings for the
selected printer, click Configure Printer.
■ To configure NetWare file servers, queues, and the notify list for the
selected printer, click Configure Network:
■ With NetWare 3.x servers. The Configure Network button displays
the Configure Network dialog box, which is used to manage
queues, the notify list, and file server connections for the selected
printer.
■ With NetWare 4.x servers. The Configure Network button opens
the NWAdmin utility, if it is installed; if NWAdmin is not installed,
this button is grayed-out.
■ To read detailed configuration information about the selected printer,
click Printer Info.
7.
To quit the PhaserShare Administrator, click Exit in the Main window.
N
O
T
E
The list is updated each time you click OK in the Search Options dialog box.


