80
PhaserShare Networking Manual
7
TCP/IP Printer Configuration (All Platforms)
Setting Syslog priorities using PhaserLink Printer Management Software
With a TCP/IP connection and a World Wide Web browser, you can use PhaserLink
Printer Management Software to set host access. For more information on
PhaserLink software, see Chapter 12, “PhaserLink Printer Management Software”.
1.
Click Configuration; this displays the View and Configure Settings page.
2.
On the View and Configure Settings page, click View and Configure
Interface Settings; this displays the View and Configure Interface
Settings page.
3.
On the View and Configure Interface Settings page, click View and
Configure Syslog Settings; this displays the View and Configure Syslog
Settings page.
4.
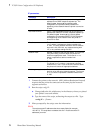
On the View and Configure Syslog Settings page, enter the log host’s IP
address or DNS name and the priority level of the threshold you want to
set.
5.
Enter the validation password (if one has been assigned), and click
Do/Apply.
Setting Syslog priorities using a PostScript utility file
To create a PostScript file to set Syslog priorities, use the script config-syslog provided
on the printer’s CD-ROM.
1.
Connect the printer to the network.
2.
Run the script config-syslog:
a.
Change (cd) to the bin subdirectory in the directory where you placed
your printer’s network utilities.
b.
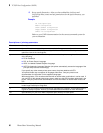
Run the script, redirecting the output to a file. Type:
3.
When prompted, enter the log host’s IP address and the priority level of the
threshold you want to set.
4.
Send the file named in Step 2b to the printer using lp or lpr.
config-syslog > filename
N
O
T
E
The script accepts IP addresses that have empty fields (for example,
123..40.10). The script does not detect this error. Double-check the IP
addresses you enter.


