Sending a Fax on Line 2
11-13
Dual Line Functions (Optional)
11
Sending a Fax on Line 2
This section outlines how to send a fax on Line 2. Note that if you disabled fax
sending on Line 2 in “Line Selection When Sending a Fax,” on p. 11-10, you will not
be able to send a fax on Line 2.
IMPORTANT
If you specified <01 AUTO> in the TX LINE SELECTION menu, you will not be able to
switch lines manually with (Line/Mail) because the machine will automatically select
the line for outgoing faxes.
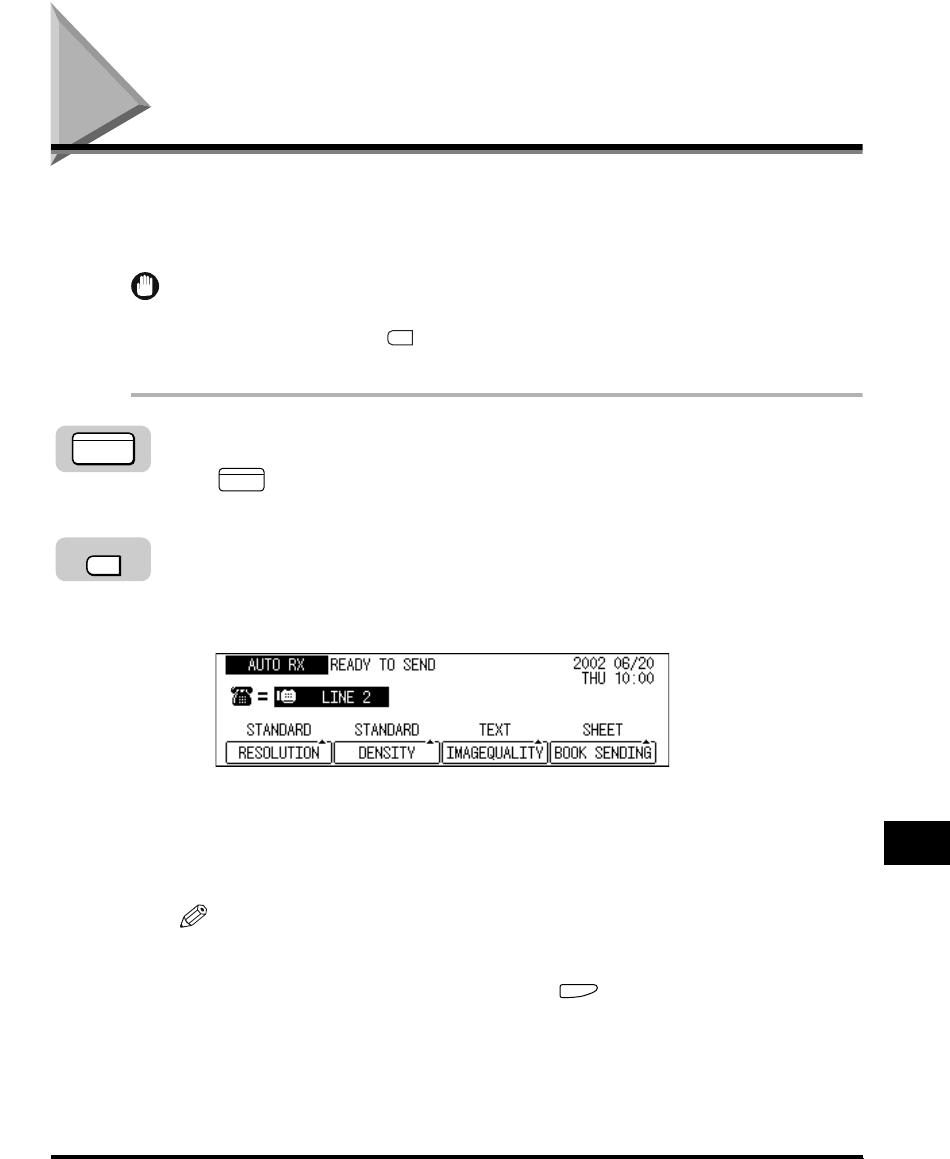
1
Press [FAX].
lights, and the machine enters the Fax Basic Features screen.
2
Press [Line/Mail] to display <LINE 2>.
If you have selected <LINE 2> in the DEFAULT TEL LINE menu according to the
instruction on “Line Selection When Sending a Fax,” on p. 11-10, this operation is
not required.
3
Place your documents on the machine.
For instructions explaining how to place your documents, see “Placing
Originals,” on p. 3-6.
NOTE
•
You can adjust the resolution, density, and image quality. (See “Adjusting the
Resolution, Density, and Image Quality,” on p. 3-12.)
•
You can also specify a sender’s name with (TTI Selector). (See “Sending a
Document with a Sender Name,” on p. 3-15.)
4
Set the sending mode.
For details about setting the sending mode, see Chapter 3, “Basic Sending.”
FAX
FAX
Line/Mail


