


2. Installing Client Software
Printing Guide — Installing Client Software for Windows 27
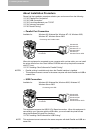
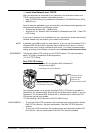
Installing Client Software for Parallel Printing
This section describes how to install the client software when this equipment is con-
nected with a printer cable.
There are three ways to set up the printer drivers for parallel printing:
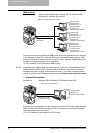
• Using the installer in the Client Utilities CD-ROM
When you insert the Client Utilities CD-ROM into your CD-ROM drive, the installer
automatically starts. You can install printer drivers and other client software using
the installer. If you want to install printer drivers as well as other client software, this
method is convenient.
P.27 "Installation for Parallel Printing Using the Installer"
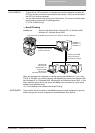
• Using Plug and Play
When this equipment is connected to a parallel port of Windows 98, Windows Me,
Windows 2000, Windows XP, and Windows Server 2003 computers, the Plug and
Play Wizard automatically starts. While you can install a printer driver using this
method, other client software cannot be installed.
P.32 "Installation for Parallel Printing by Plug and Play"
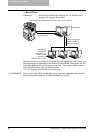
• Using Add Printer Wizard
When you want to install different printer drivers after installing a printer driver using
Plug and Play, or when you want to install the printer drivers without using the
installer or Plug and Play, install the printer drivers using the Add Printer Wizard.
P.40 "Installation for Parallel Printing by Add Printer Wizard"
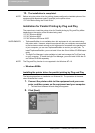
Installation for Parallel Printing Using the Installer
Installing the client software for parallel printing
The following describes an installation on Windows 2000. The procedure is the same
when other versions of Windows used.
NOTE: You must log into Windows as a user who has the “Administrators” or “Power Users”
privilege when using Windows NT 4.0, Windows 2000, Windows XP, or Windows
Server 2003.
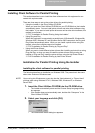
1. Insert the Client Utilities CD-ROM into the CD-ROM drive.
• The installer automatically starts and the Choose Setup Language dialog
box appears.
• If the installer does not automatically start, double-click “Setup.exe” in the
Client Utilities CD-ROM.
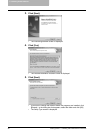
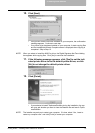
2. Select your language and click [OK].
• The InstallSheild Wizard dialog box appears.