4. Monitoring Print Jobs
Printing Guide — Monitoring Print Jobs with TopAccessDocMon 317
— Starting TopAccessDocMon
First, load TopAccessDocMon so its icon appears on the Windows operating system
taskbar. You only need to do this once.
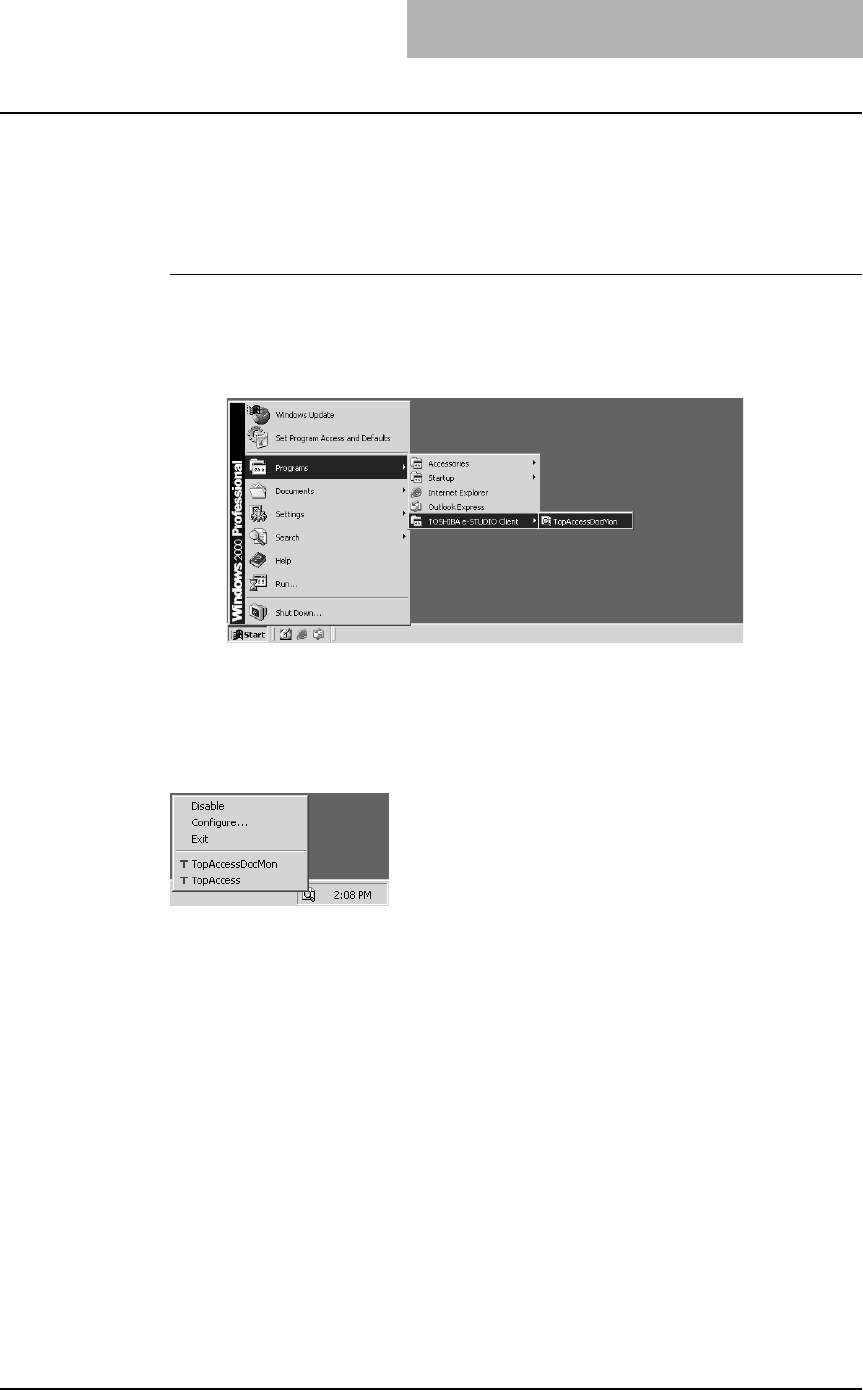
Starting TopAccessDocMon
1. Click the [Start] menu.
2. Select [TOSHIBA e-STUDIO Client] in the [Programs] menu,
and click [TopAccessDocMon].
• The TopAccessDocMon icon appears in the taskbar.
— Document Monitor Taskbar Menu
After TopAccessDocMon is activated, you can access its functions from the Document
Monitor menu (display from the TopAccessDocMon icon in the taskbar).
The following menus appears in the Document Monitor taskbar menu:
• Disable/Enable — This allows you to enable or disable document monitoring.
To turn on document monitoring, click [Enable] from the Document Monitor menu.
The option changes to Disable and displays the TopAccessDocMon icon on the
taskbar. Click [Disable] to terminate document monitoring.
• Configure — This allows you to configure how TopAccessDocMon monitors the
devices. When this is selected, the configuration dialog box appears.
P.318 "Configuring TopAccessDocMon"
• Exit — This allows you to exit TopAccessDocMon.
• TopAccessDocMon — This allows you to display the TopAccessDocMon window
for the default printer.
P.328 "TopAccessDocMon Window"
• TopAccess — This allows you to access TopAccess on the default printer. This is
available only when the default printer is set to either the e-STUDIO451c Series, e-
STUDIO850 Series, e-STUDIO4511 Series, e-STUDIO450 Series, e-STUDIO280
Series, GL-1020, or GL-1010.
